

A peek at some early work on a new set of word-themed pages. For now, the words are: better, essential, vivid, brave, forgiven, and cared for. I’ve been thinking a lot about compassion directed inward — about recognizing courage, taking time to take care, and letting go of the past. It's slow going, but I think that's just part of the process. It takes as long as it takes.
Envelope Journal

I’ve been feeling the itch to make something new. Something fun and journal-related. Something with pretty paper.
When I pulled out my paper stash, my mini envelope templates were right on top. It got me to thinking . . . How about a journal made of envelopes?
I chose several sheets of pretty paper and my 2.5”x2” envelope template and started tracing.

And cutting.

And folding.

And sewing.
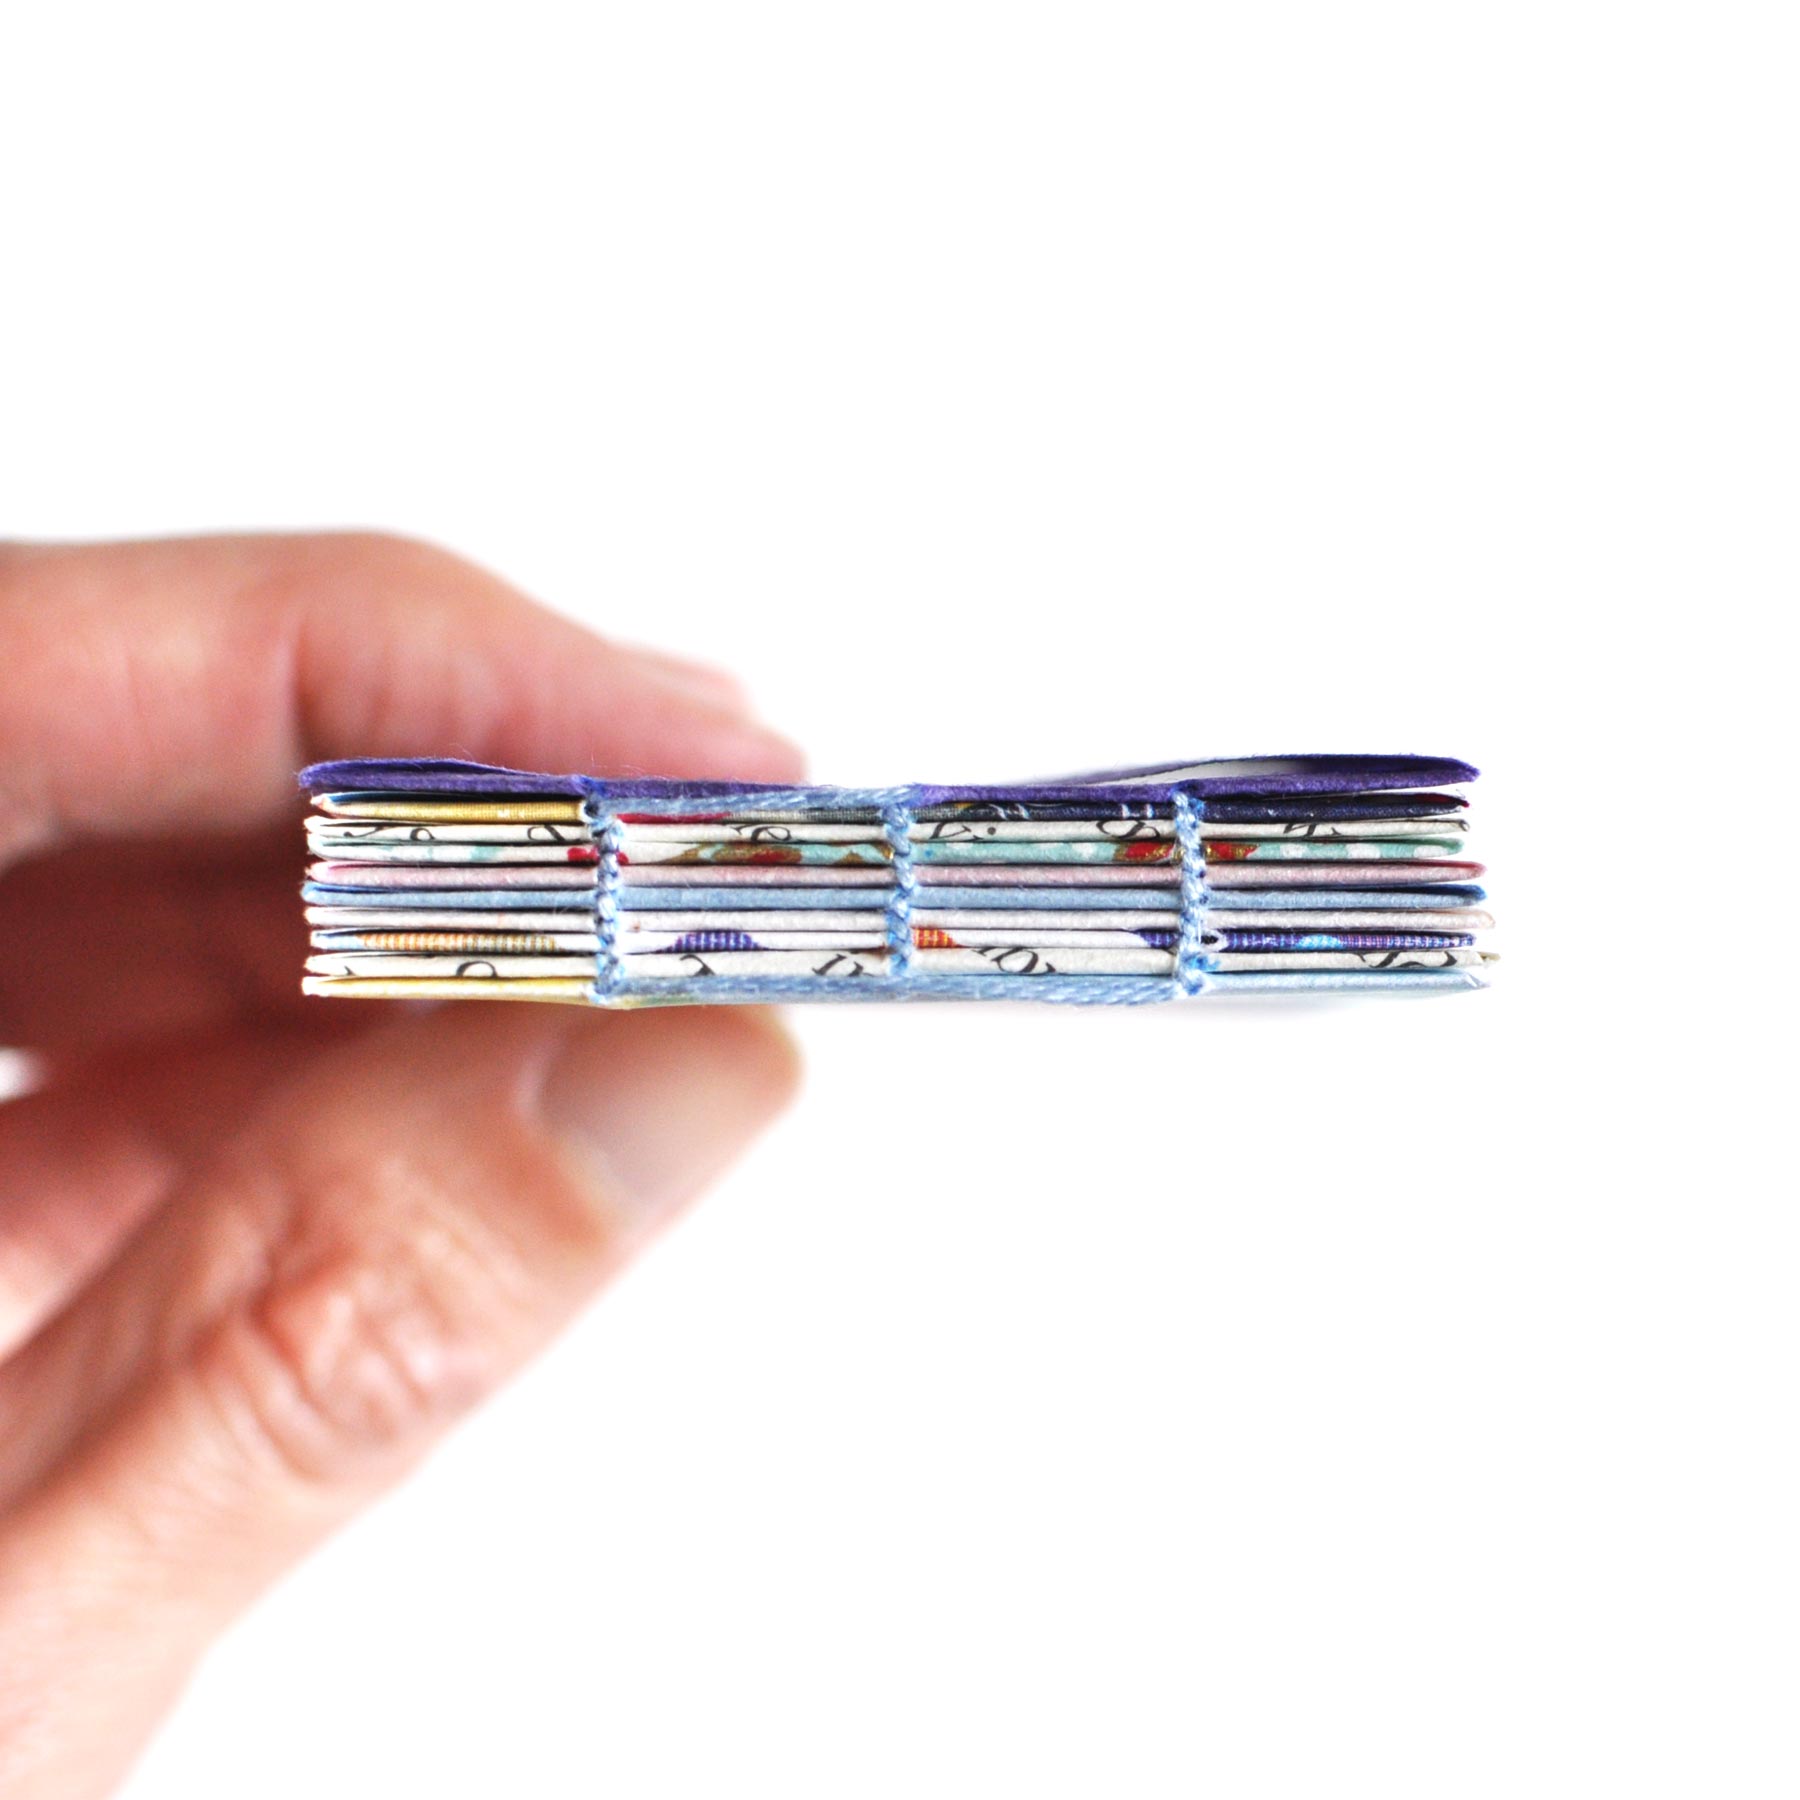
I figured out the binding pattern as I went along, which explains the big stitch right at the top. If anyone asks, I totally meant for that to be there. It’s decorative.

Here’s the finished binding:
And the finished journal, from a bunch of different perspectives:
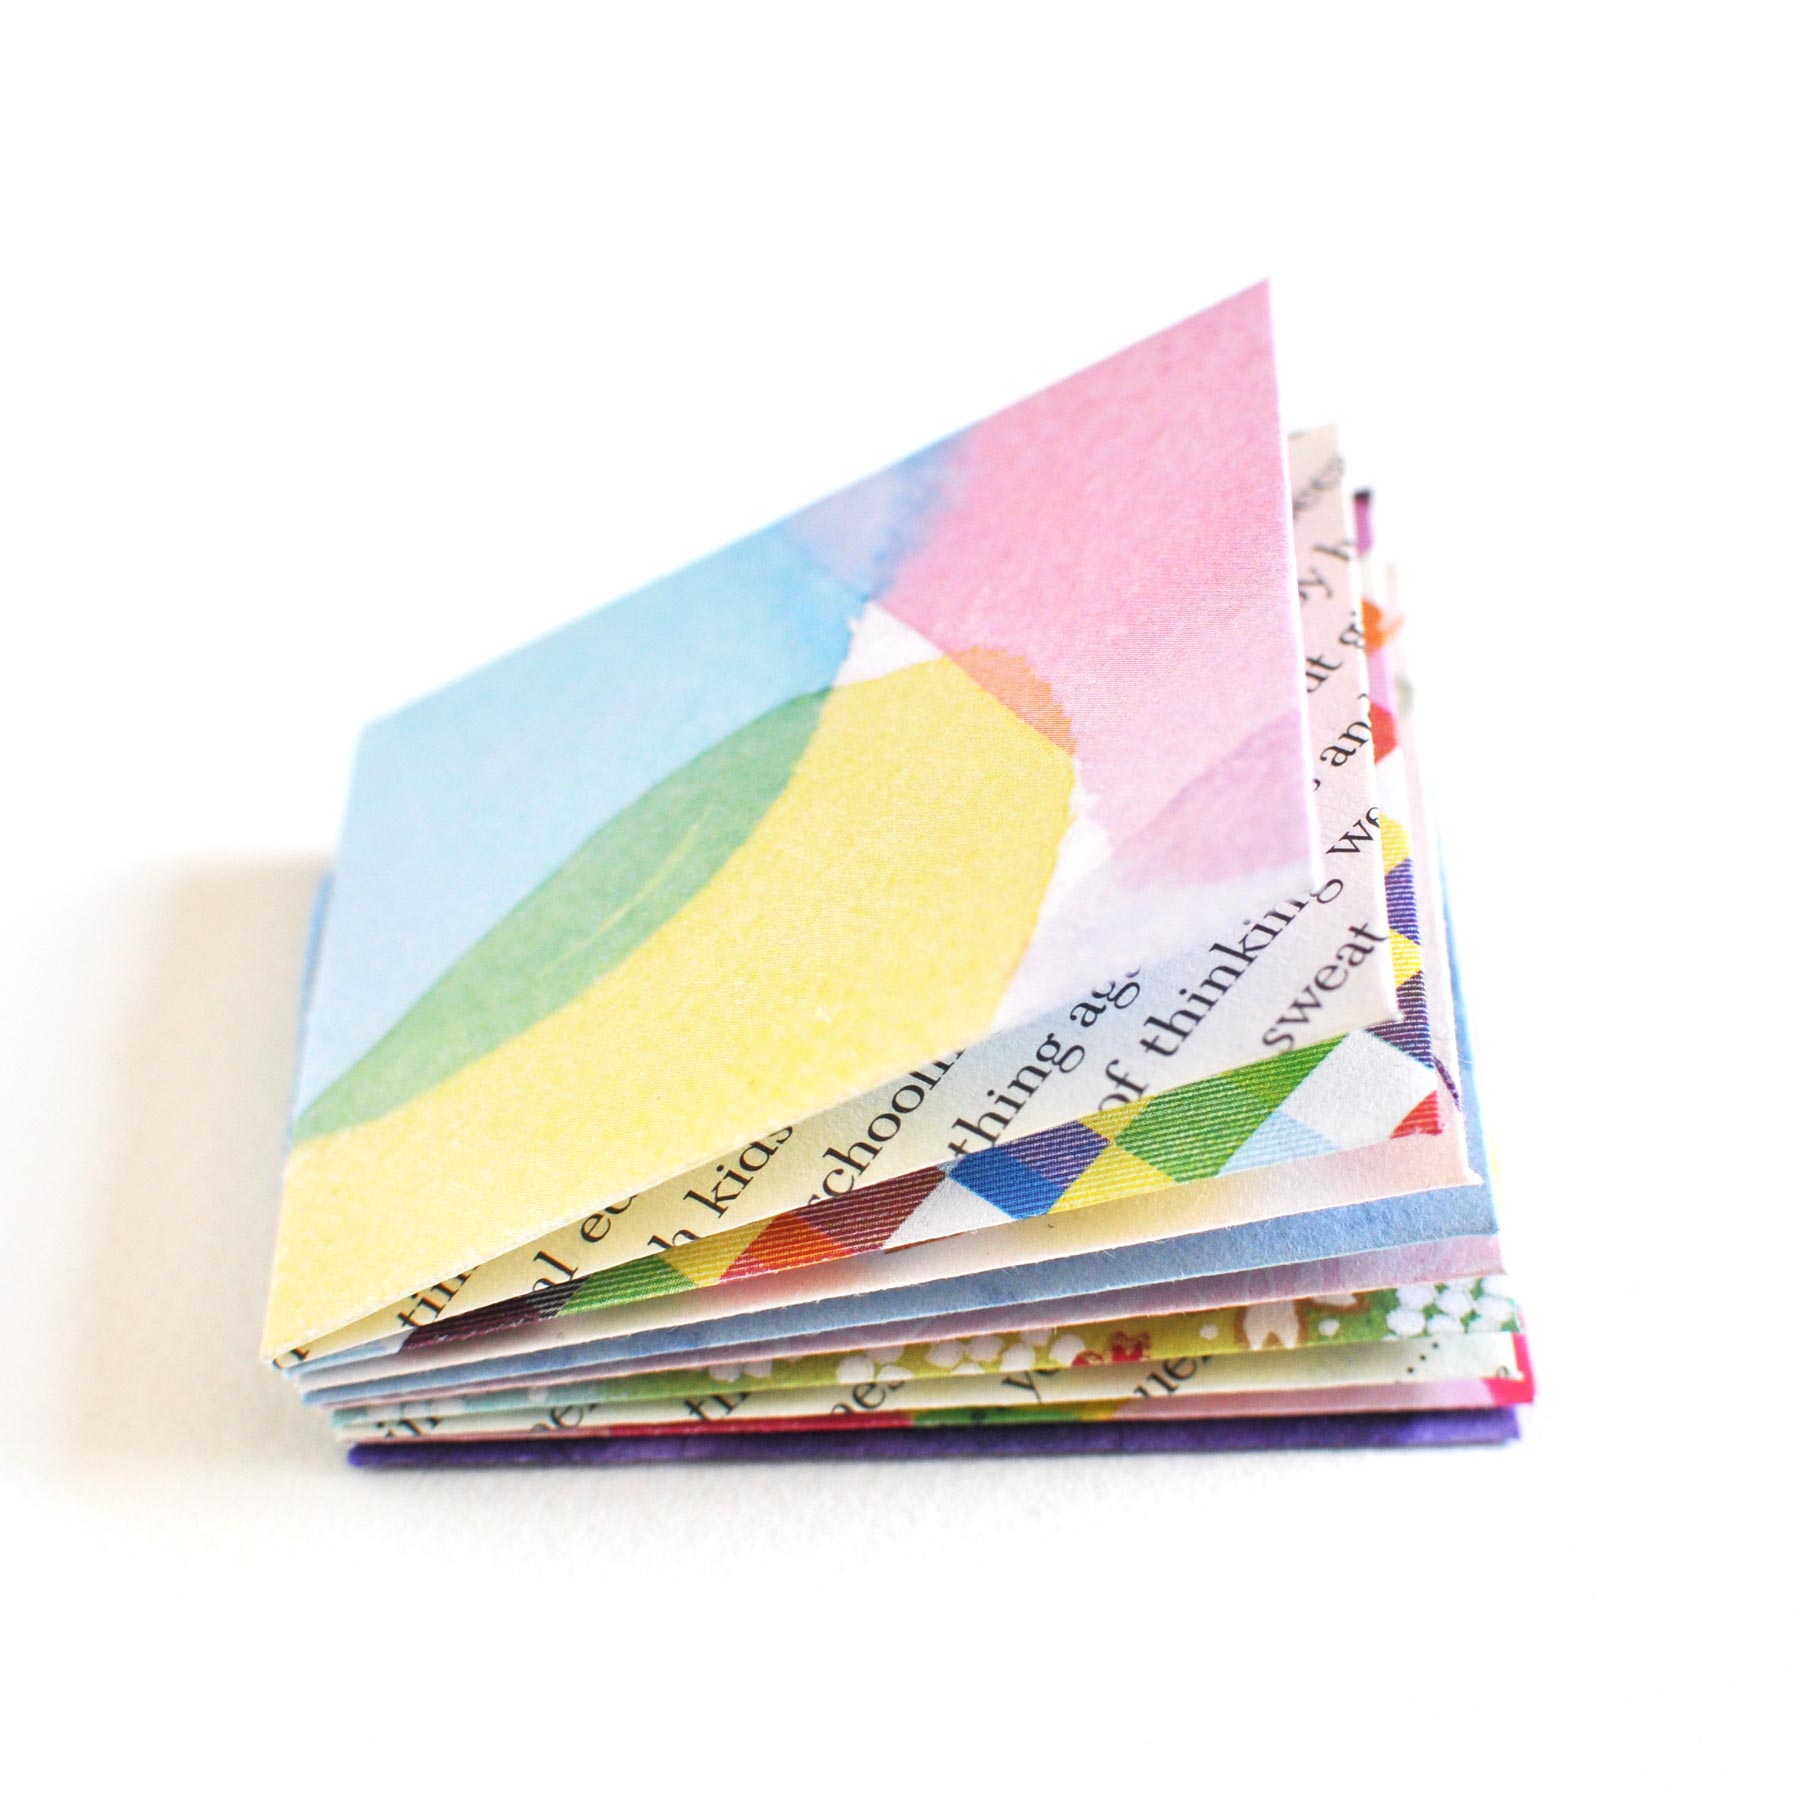

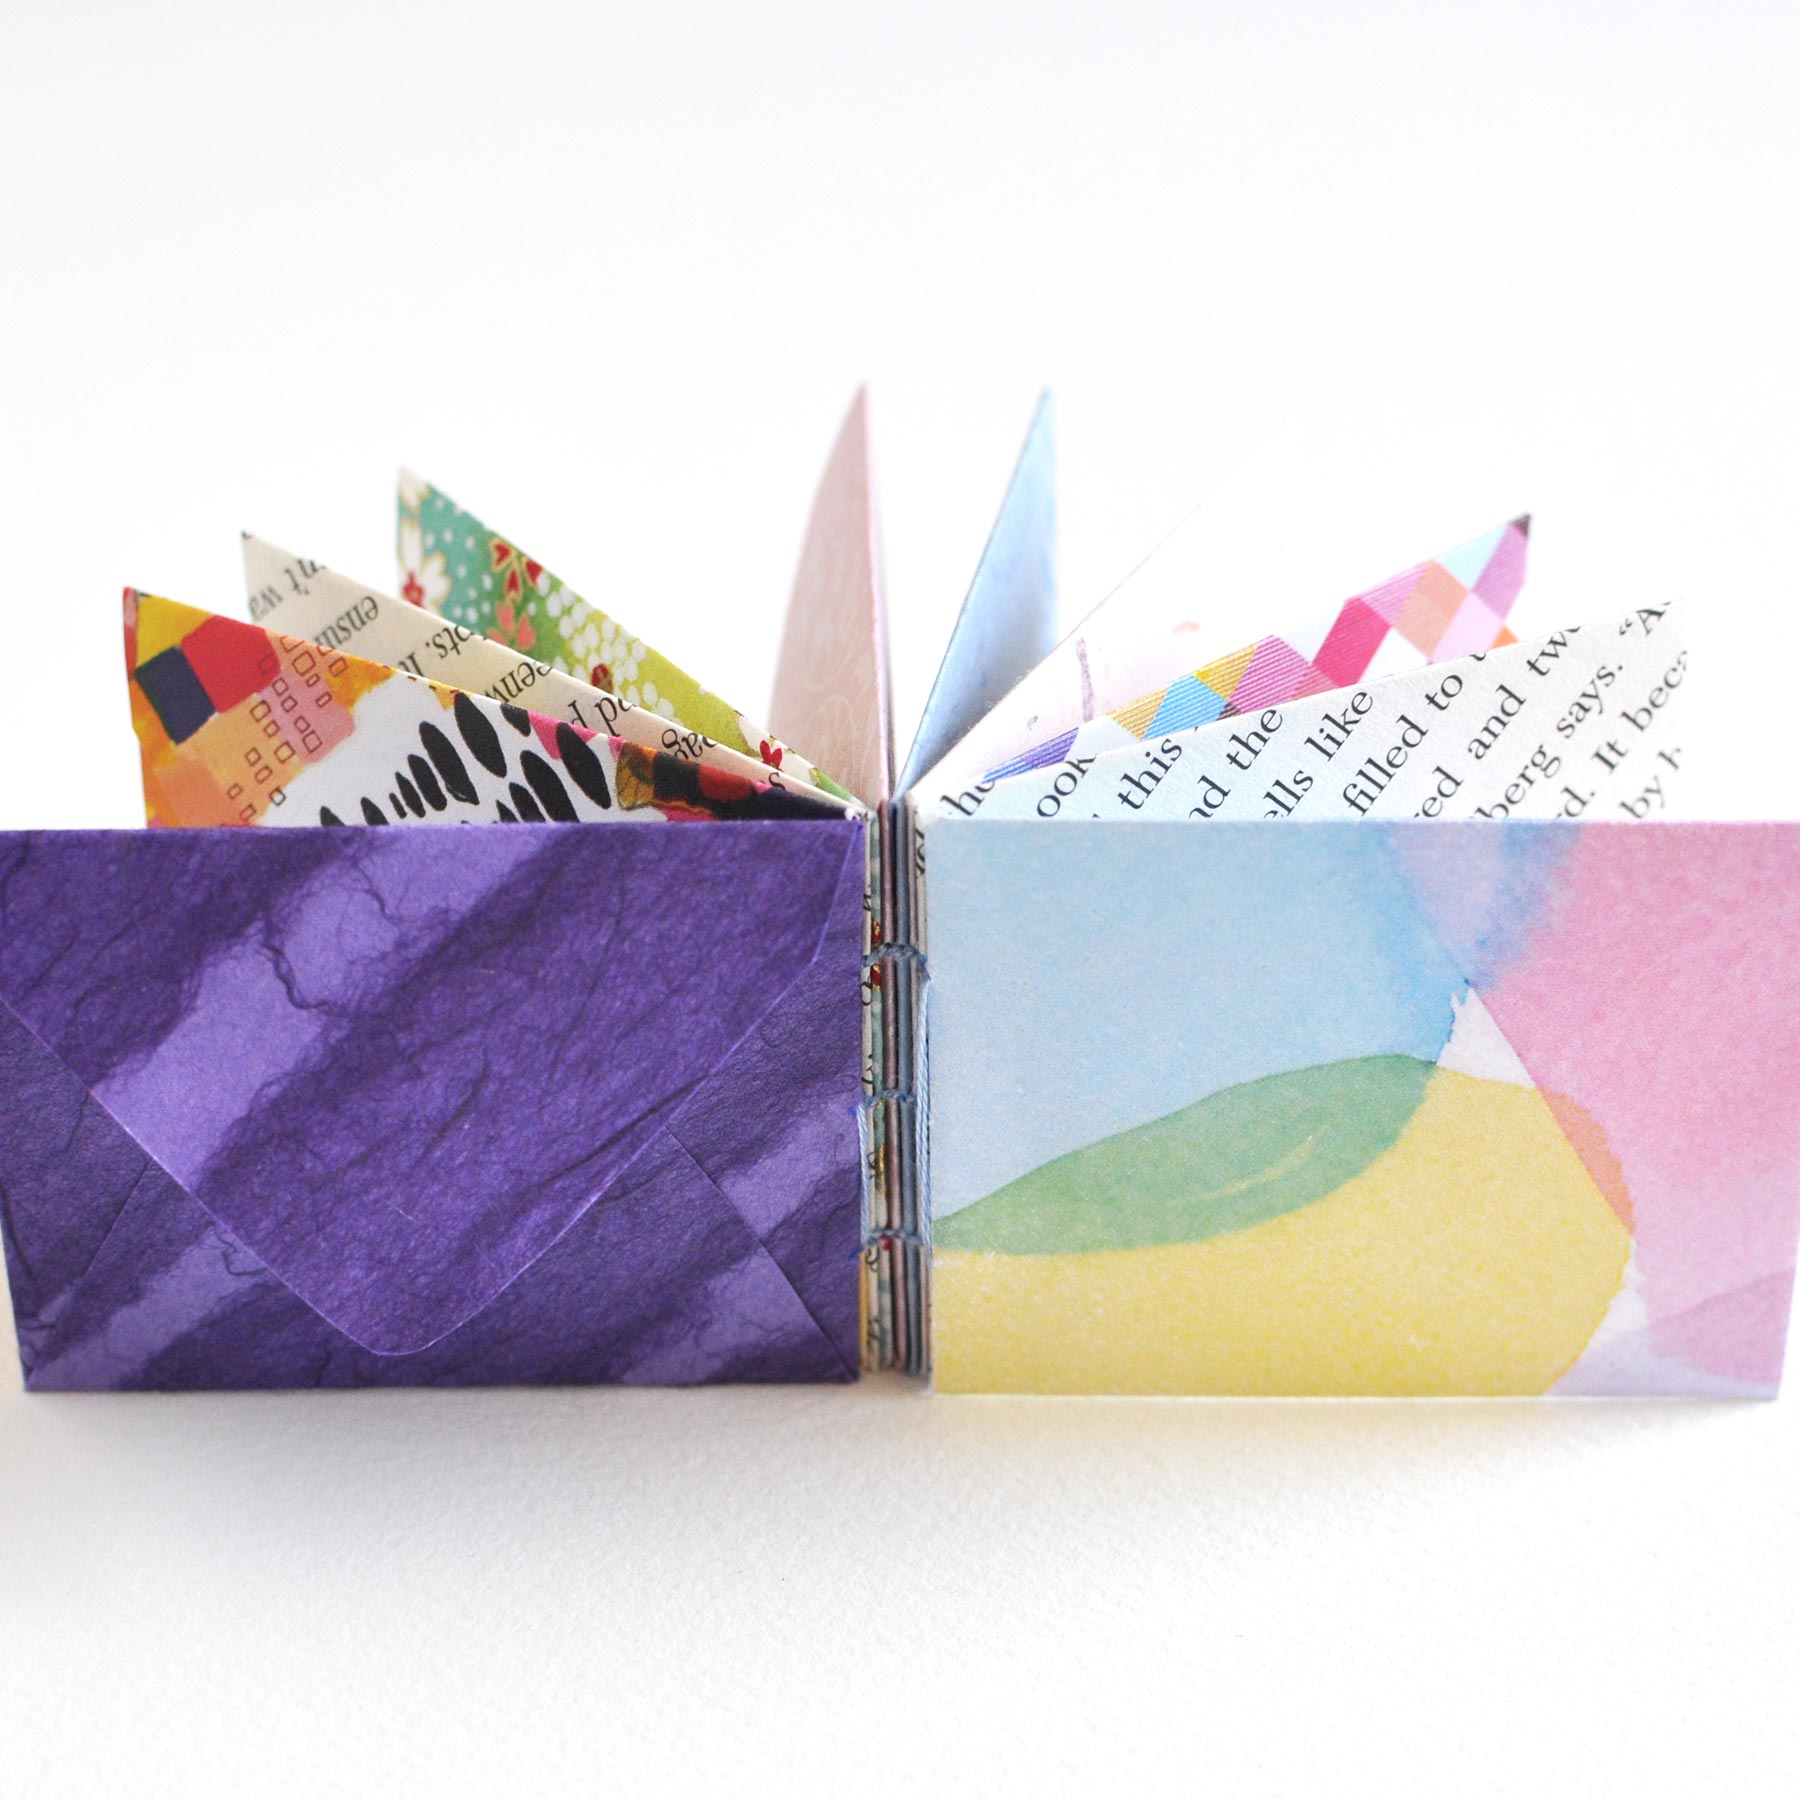

There are ten envelopes in total. I just need to decide how to fill each one. Any ideas?
Thinking Through a New Journal Page

I have an idea for a new journal page (or set!). It may or may not work out in the end, but I thought it might be fun to think it through with you here on the blog this week.
The page started with the idea of a map. Specifically, I was thinking of those lovely illustrated city or country maps featuring a place and a collection of its streets and landmarks. They’re not drawn to scale, but to give the viewer a sense of the place. I love how sweet they are — full of history or natural beauty, or sometimes the illustrator’s memories of places she visited while she was there.
I wondered if that kind of map might make a good journal page — if the main streets could be a way to represent themes or lists, if intersections could represent relationships between ideas, and if important details could be shown on the map as landmarks. I wondered if a sort of illustrated map/journal page hybrid could be a creative way to explore everyday experiences and seek out new insights.
The result is what you see above. It’s as far I’ve gotten. Now that I see it down on paper, I don’t think it’s quite there yet. It’s not obvious how to approach the page and, when finished, I’m wondering if the map works to clarify ideas in a meaningful way.
I think I’ll step away from it for a while, but I’ll be back here tomorrow with new eyes and a fresh perspective. In the meantime, what do you think?
Make Your Own Mini Cloud Journal

This little journal isn’t exactly practical. It probably isn’t very sensible either. It’s also lopsided from some angles and each time I make a new one, it’s never quite the same as the last.
But everything about it makes me smile — the cloud-shaped pages, the blue on blue on blue, and the lovely little bow right in the middle. It’s good for sky’s-the-limit brainstorming and head-in-the-clouds musings. It’s also suitable for noting gratitude, good things, and madcap adventures. (I’ve even done a little something with it that you might not expect. I’ll show you in just a moment.)
If you’d like to make your own cloud journal, I’ve whipped up a quick printable and tutorial for you — for moments when you’re feeling a little impractical or un-sensible and a regular rectangular journal just won’t do.
To begin, you’ll find my mini cloud journal template right here or by clicking on the image above or below. (The file includes two page sizes. The first page is letter sized. The second page is A4.)
You’ll also need extra paper to make your cloud pages, a pencil, scissors, something pointy for poking holes (I forgot to include my little sewing awl in the image below, but you’ll see it further down), a sewing needle, and about a 6-8 inch length of thread (I used embroidery floss).

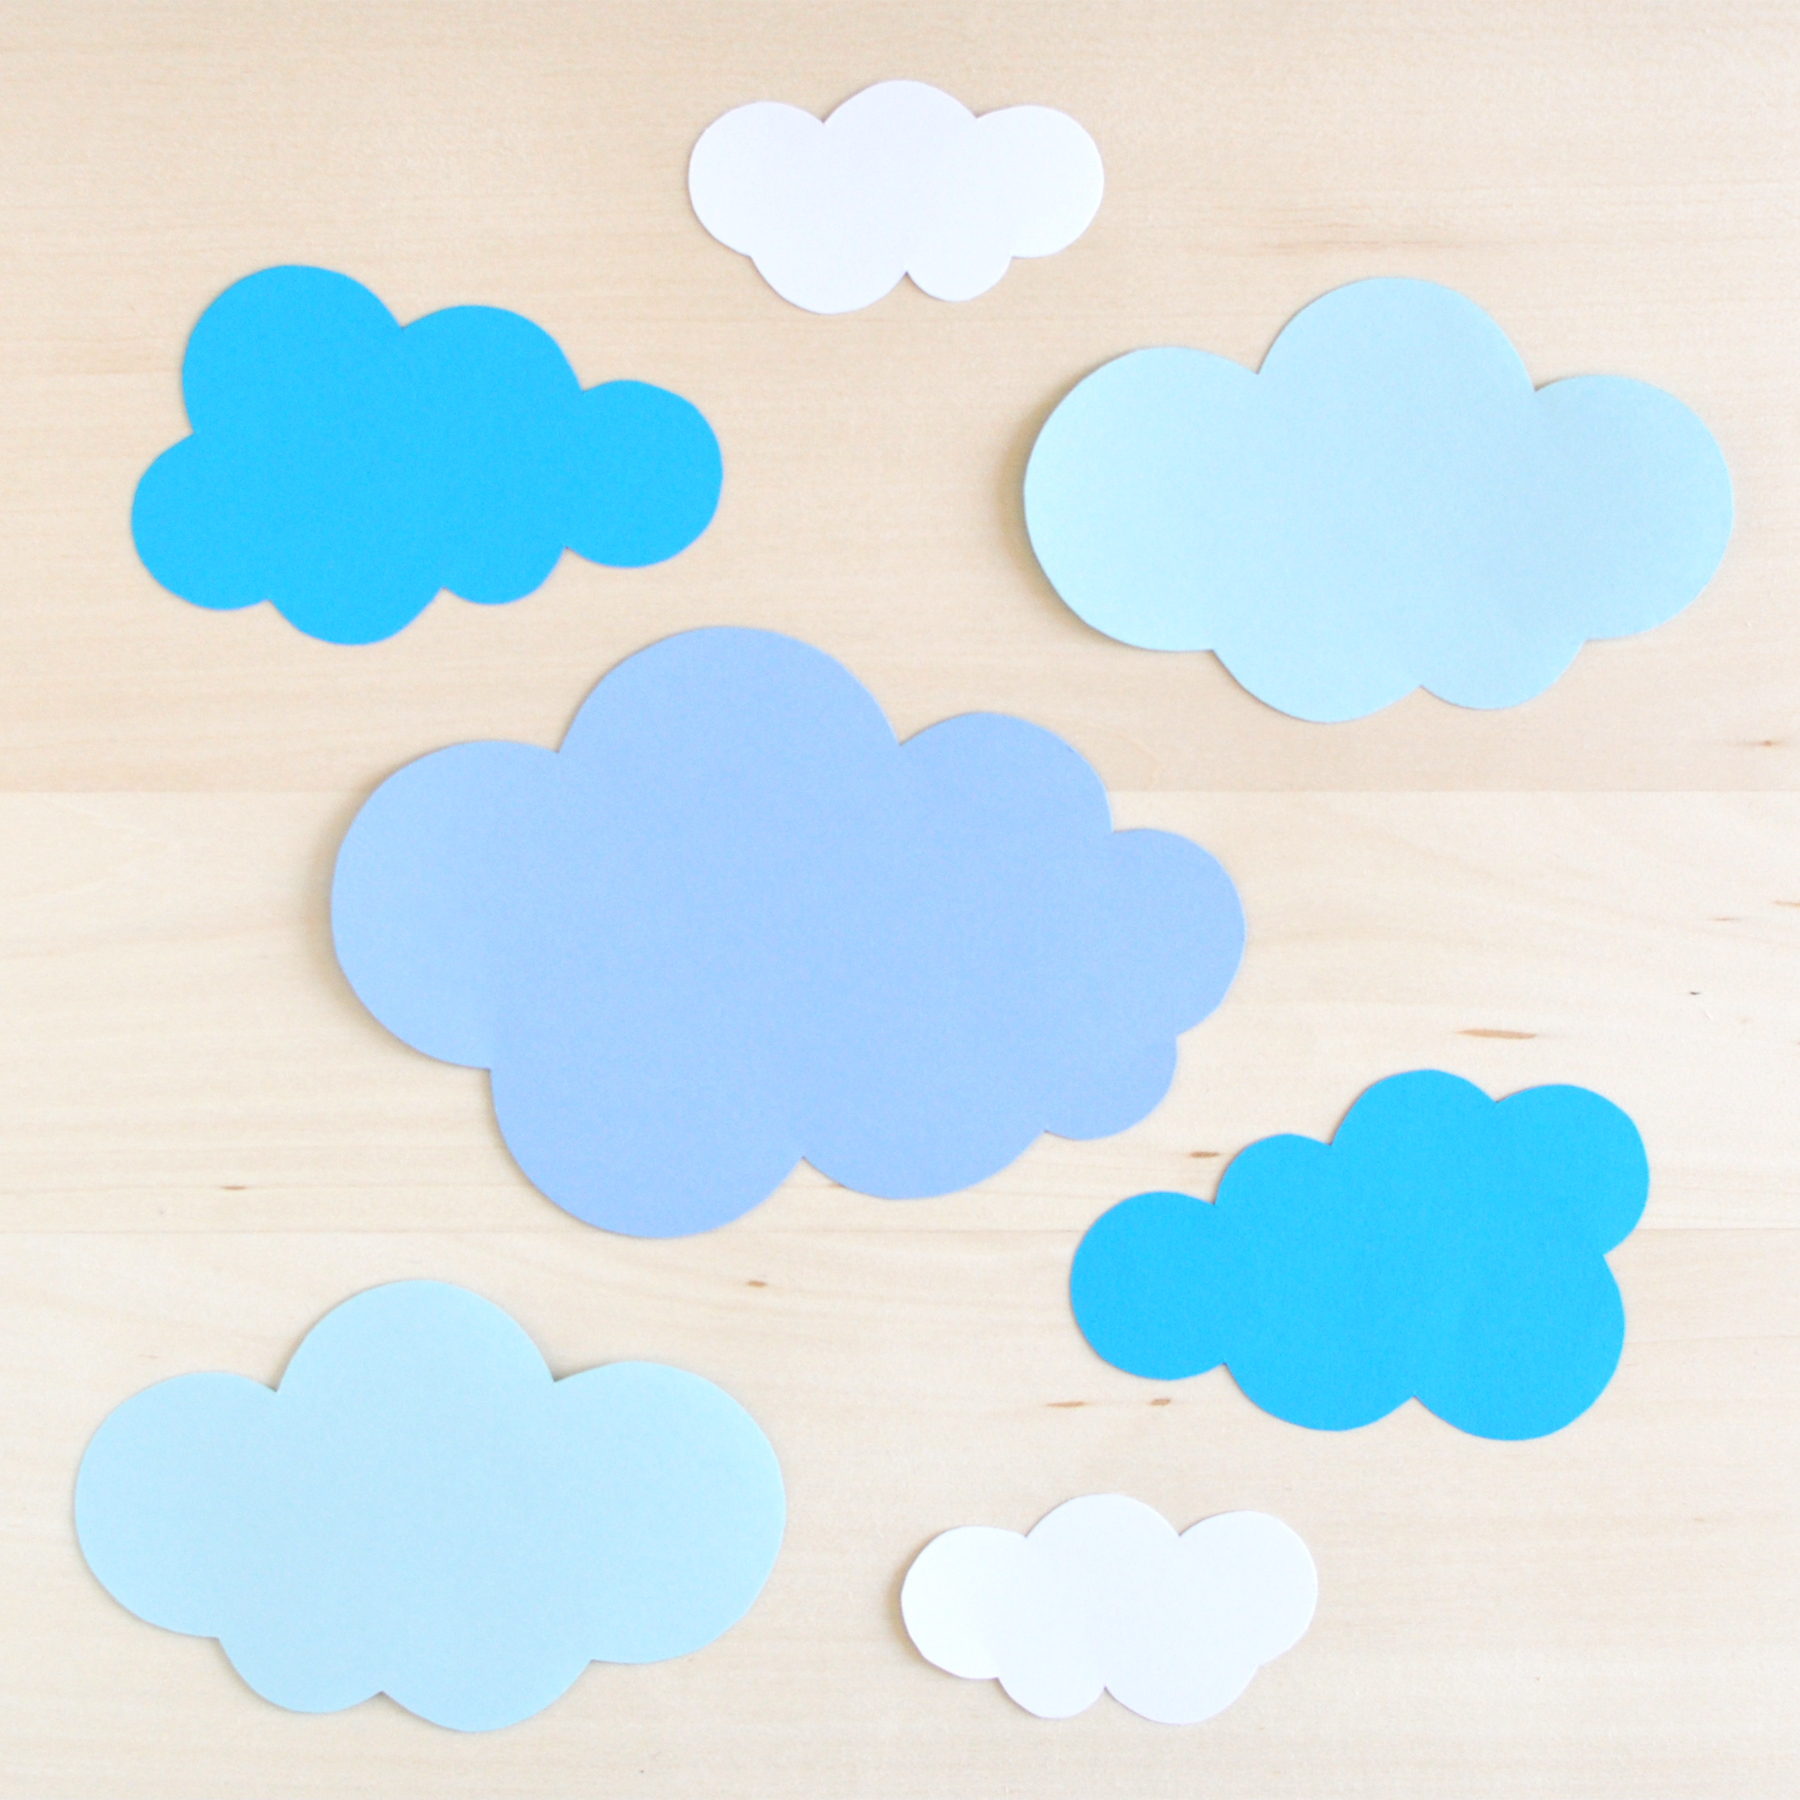
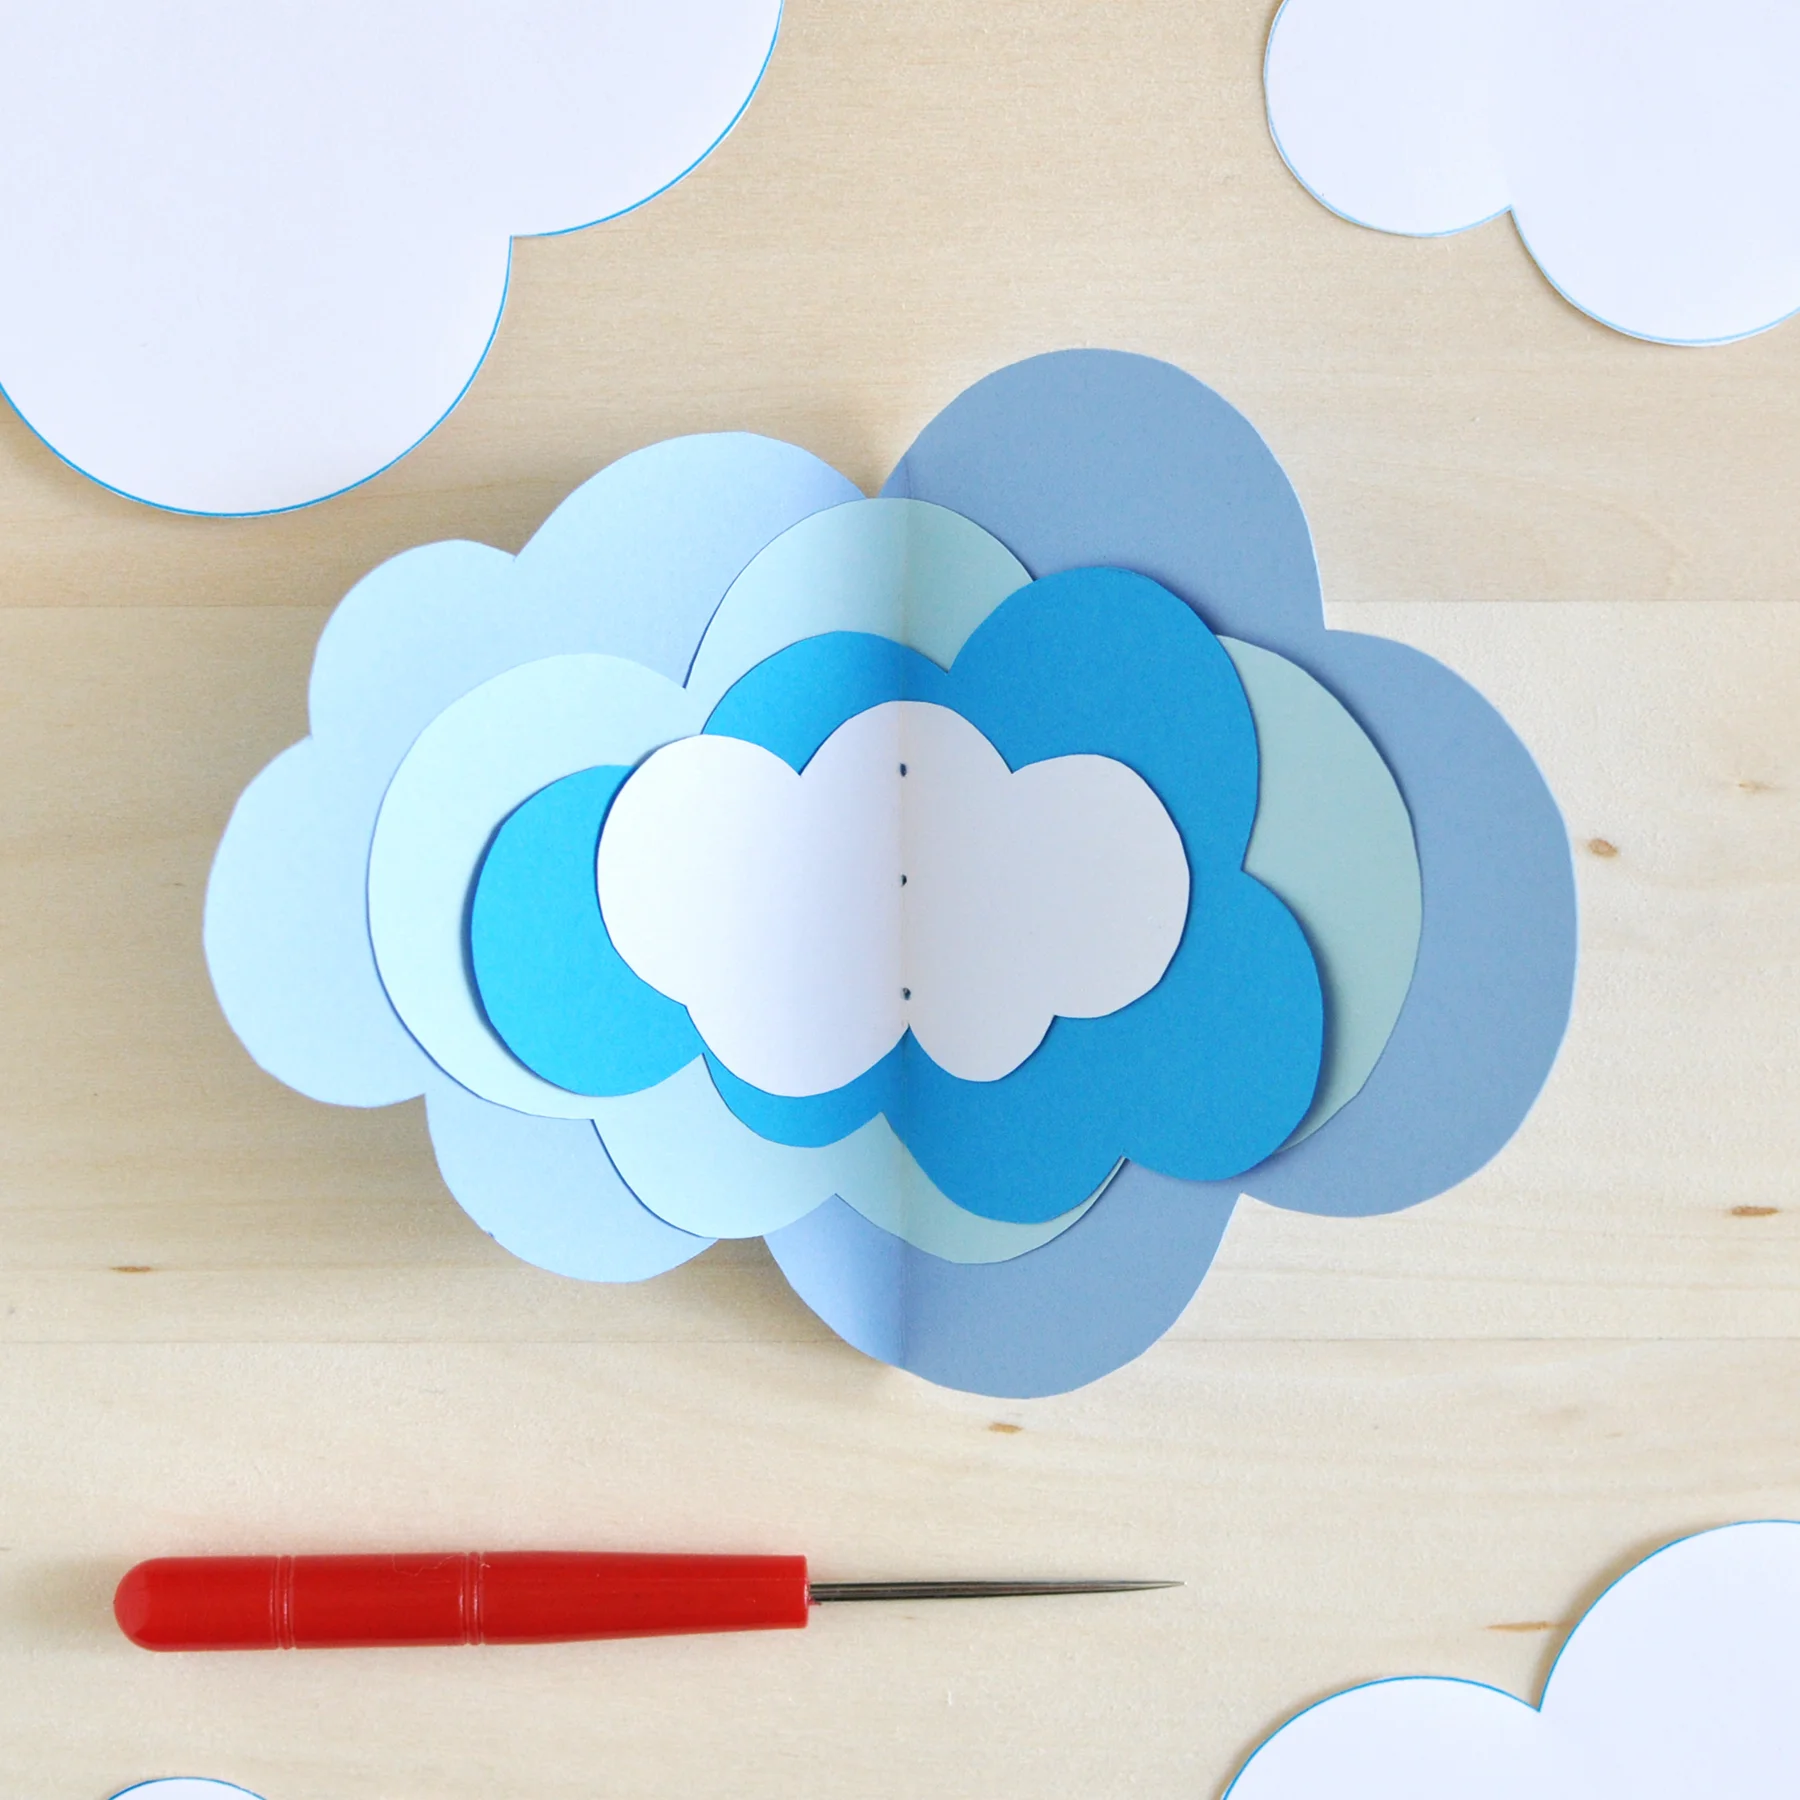
Start by cutting out the cloud templates (image below, left) and tracing them onto your selected cloud paper. I cut out one of the largest clouds and two of each of the remaining clouds (image below, right).

Here’s the unexpected part. After folding each cloud in half individually — I just eyeballed the halfway point and went for it — I arranged the clouds from largest to smallest on the inside of the journal (image below, left), then did the same on the outside (image below, right), so that the largest cloud is the fourth cloud in a stack of seven. This way, there are tiny clouds on the inside and outside of the journal.


Now it’s time to poke the holes and sew the journal together. The red handled item pictured below is the awl I used to make the holes. Again, I estimated a nice middle spot and poked the first hole, then one more above and below (image below, top left).
To sew the binding:
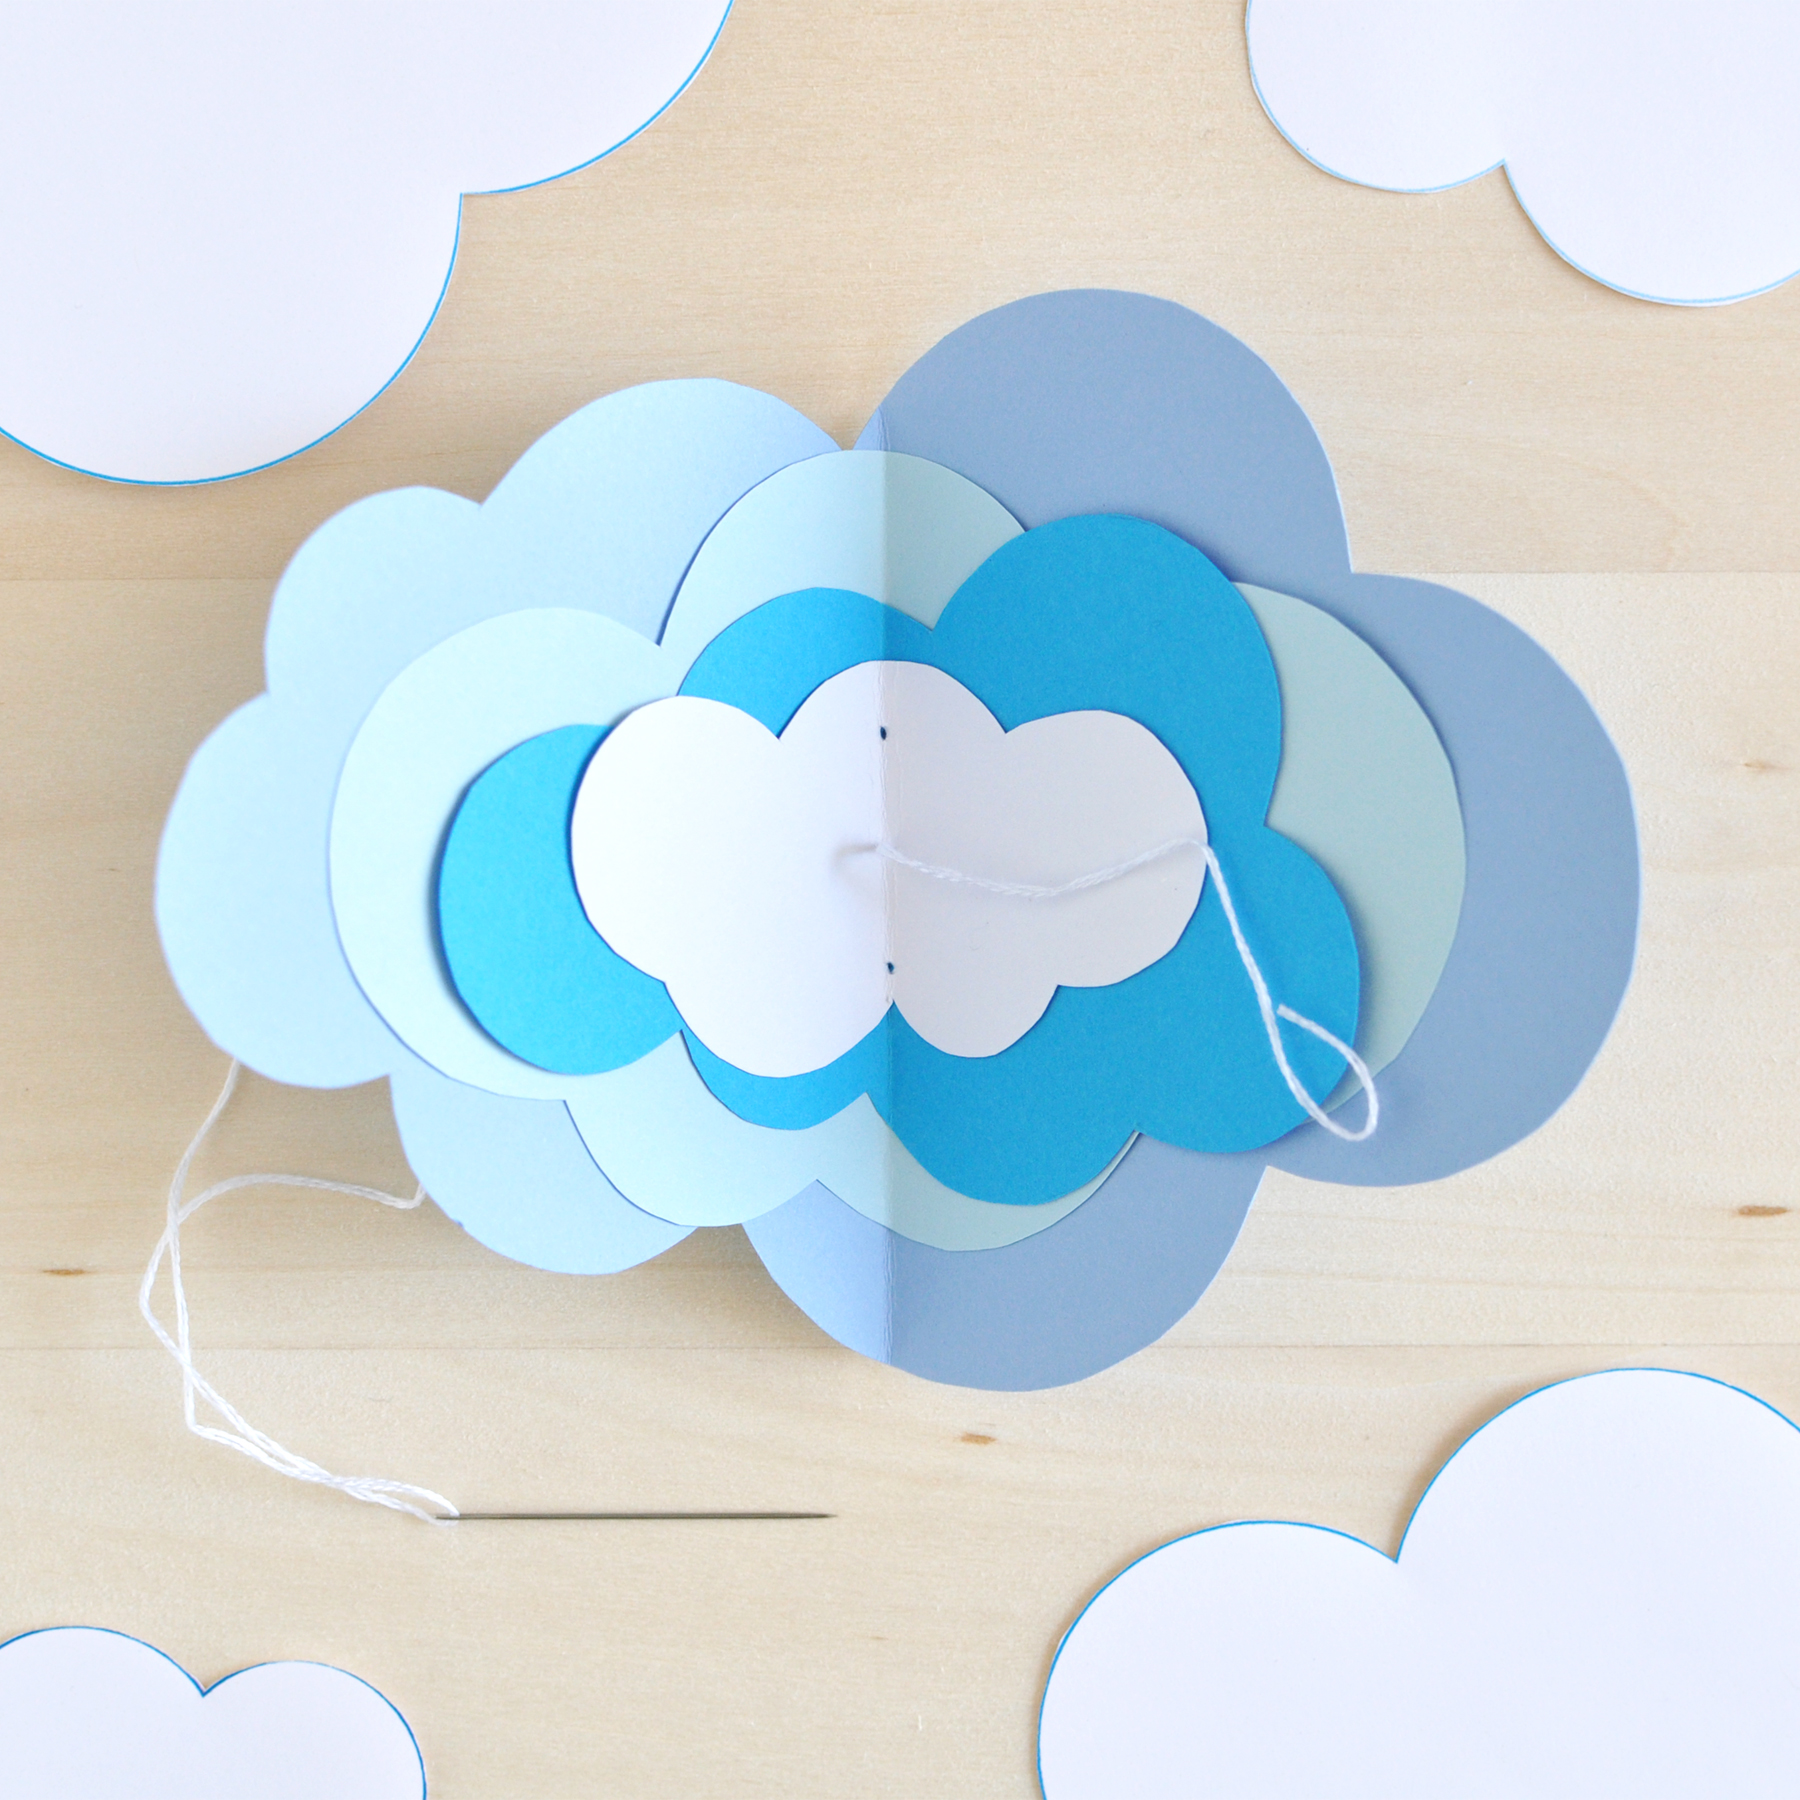
Holding the journal open in front of you, pass your needle and thread through the front middle hole, leaving a tail that you’ll later use to tie a small knot and bow. (image below, top right).
From the back of the journal, pass the needle through the top hole to the front of the journal and then down, through the bottom hole, to the back of the journal. Make sure your tail is to one side of the long stitch you’ve just made (image below, bottom left).
From the back, pass your needle back through the middle hole, this time coming through the front on the side of your long stitch opposite to the tail (image below, bottom right).
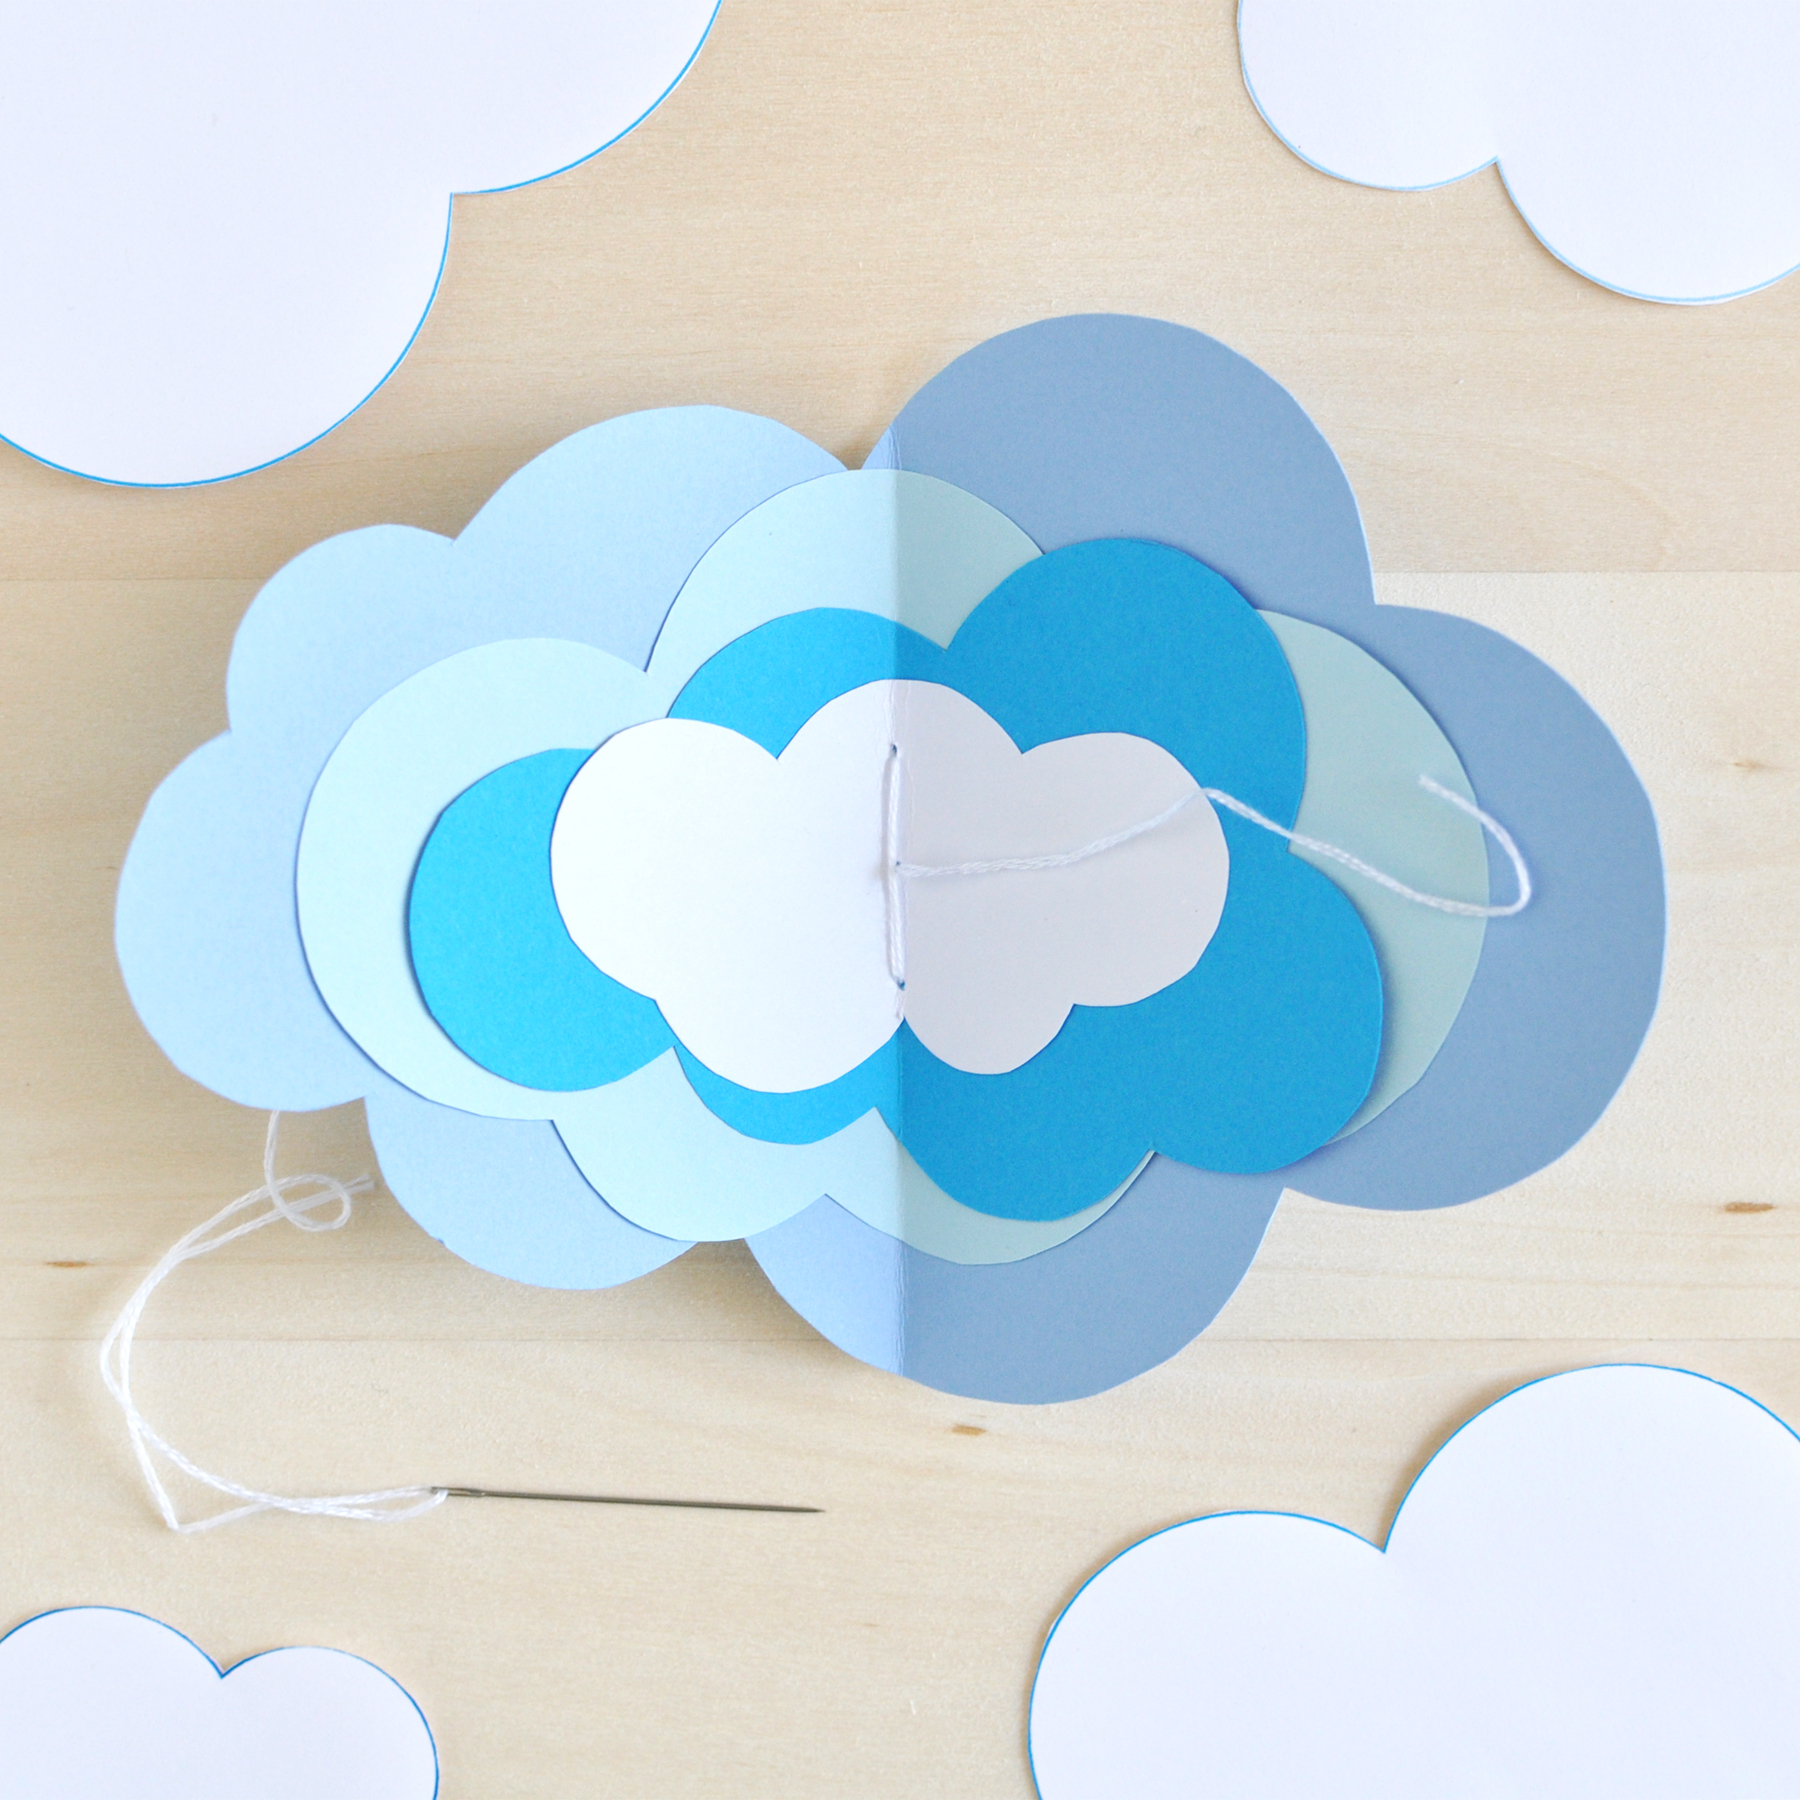

Separate your needle from the thread and tie a knot in your thread on top of the long stitch in your journal’s binding. Then tie a lovely little bow and snip the ends of the thread.

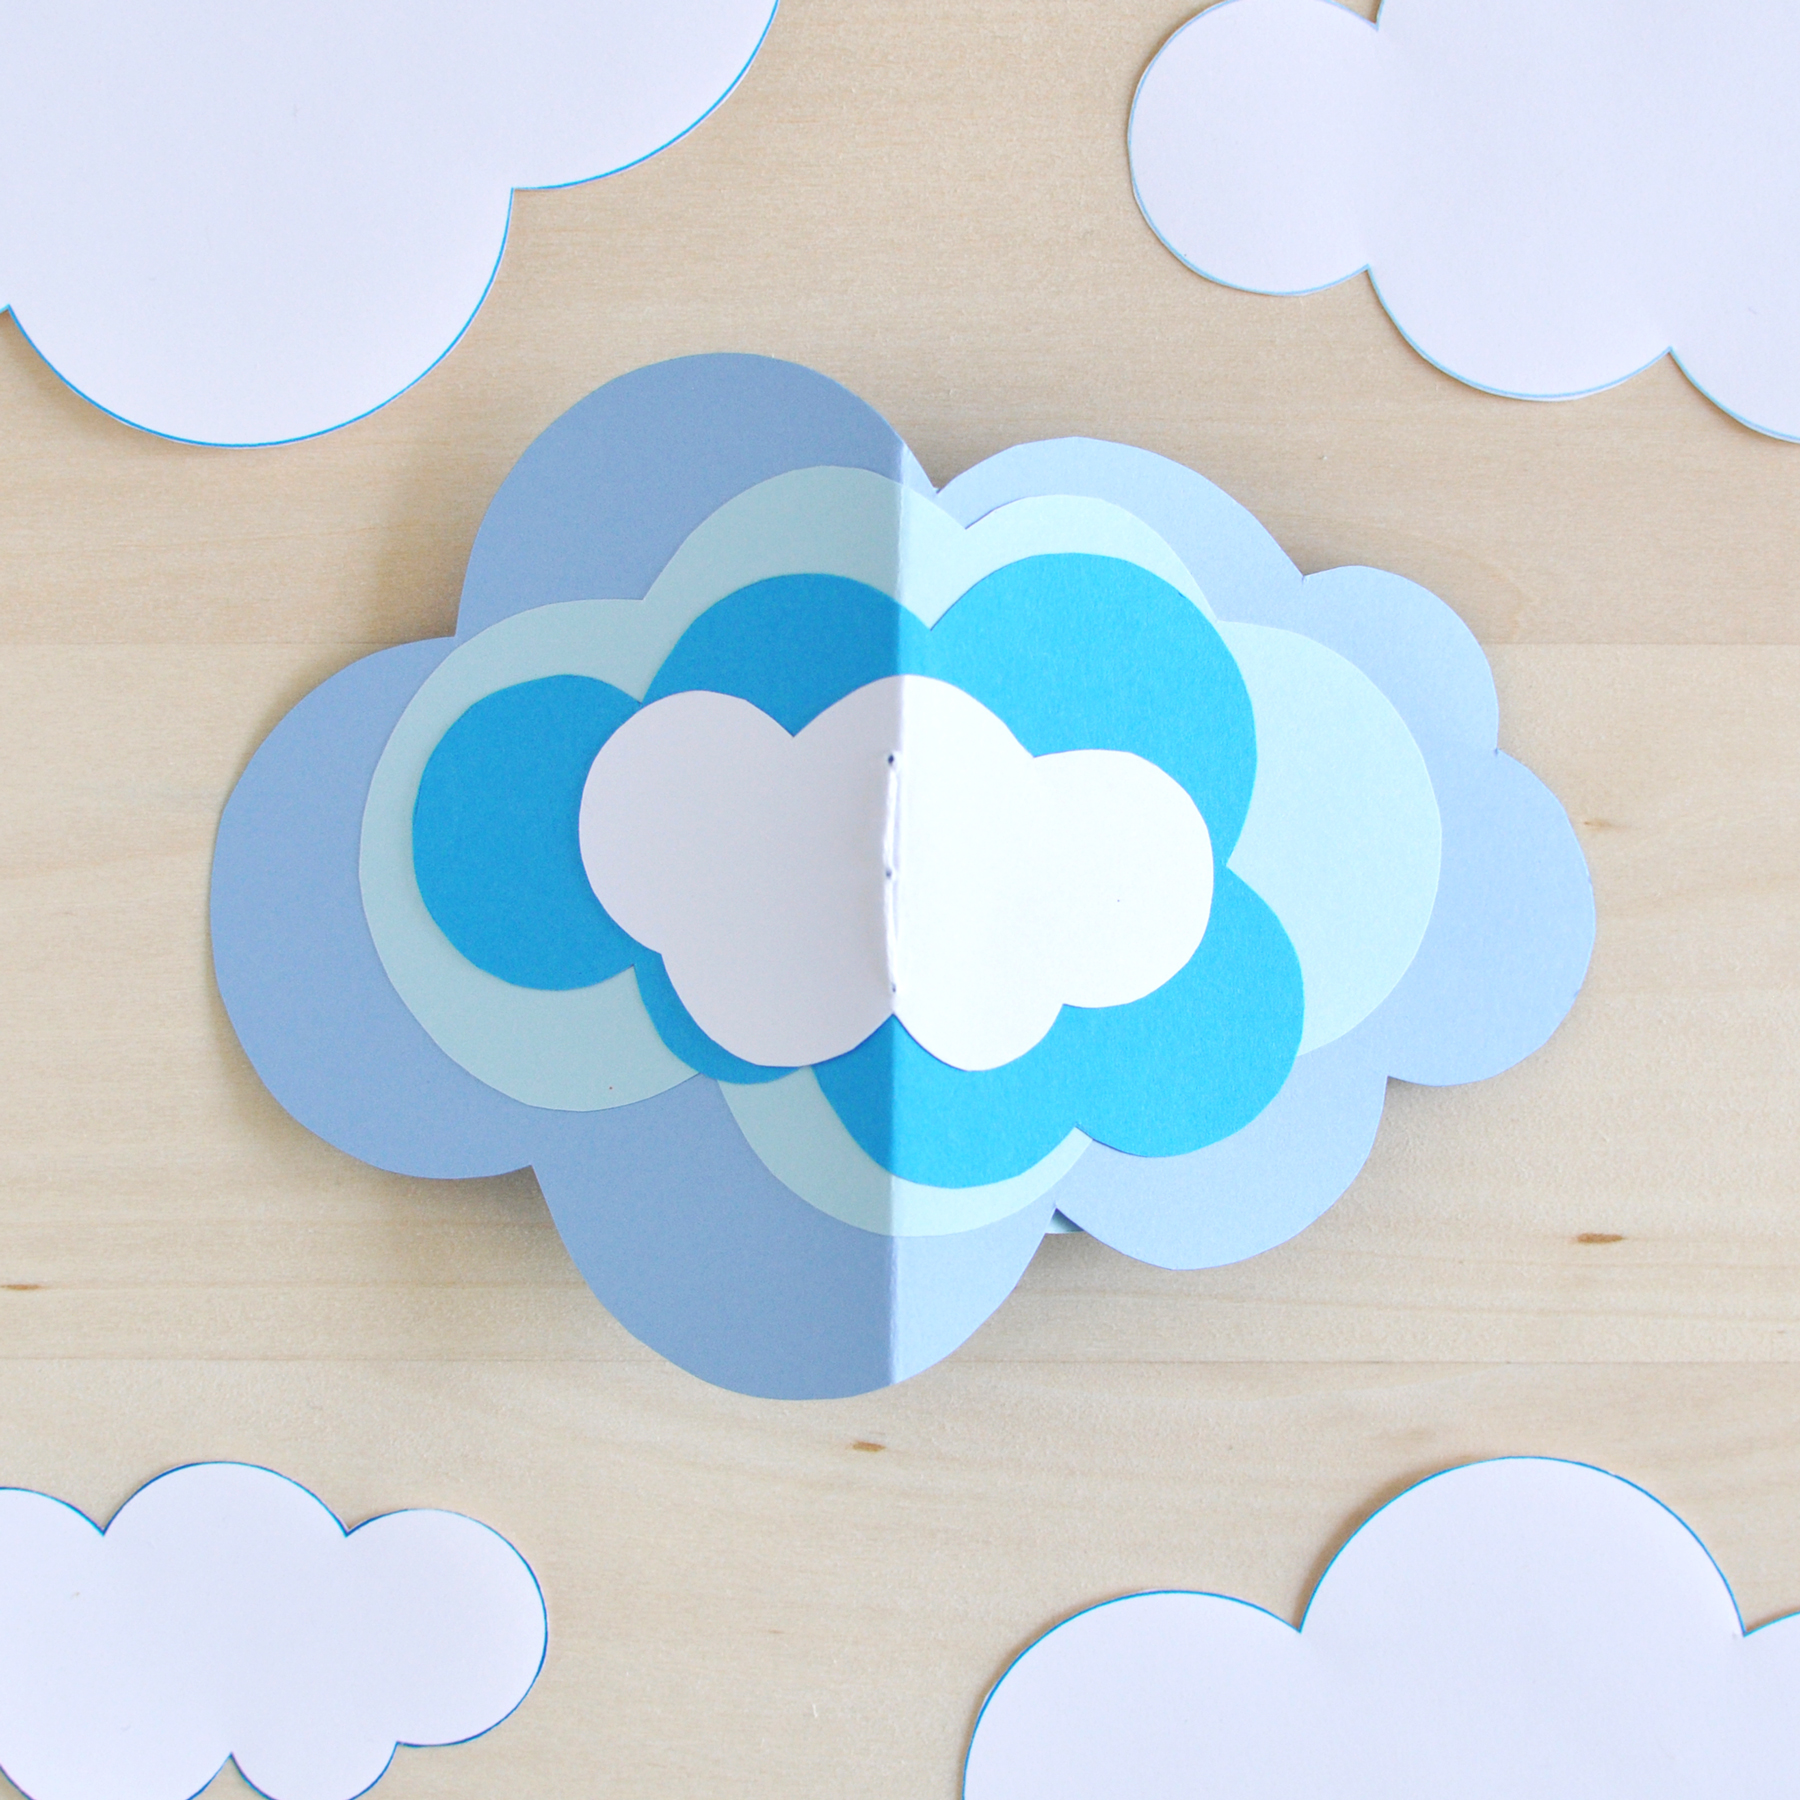
That’s it! You’re finished!
I hope your time spent in the clouds while making this little journal inspires all sorts of new sky’s-the-limit adventures.
As always, best wishes and happy journaling!

Printable mini guided journal and envelope template

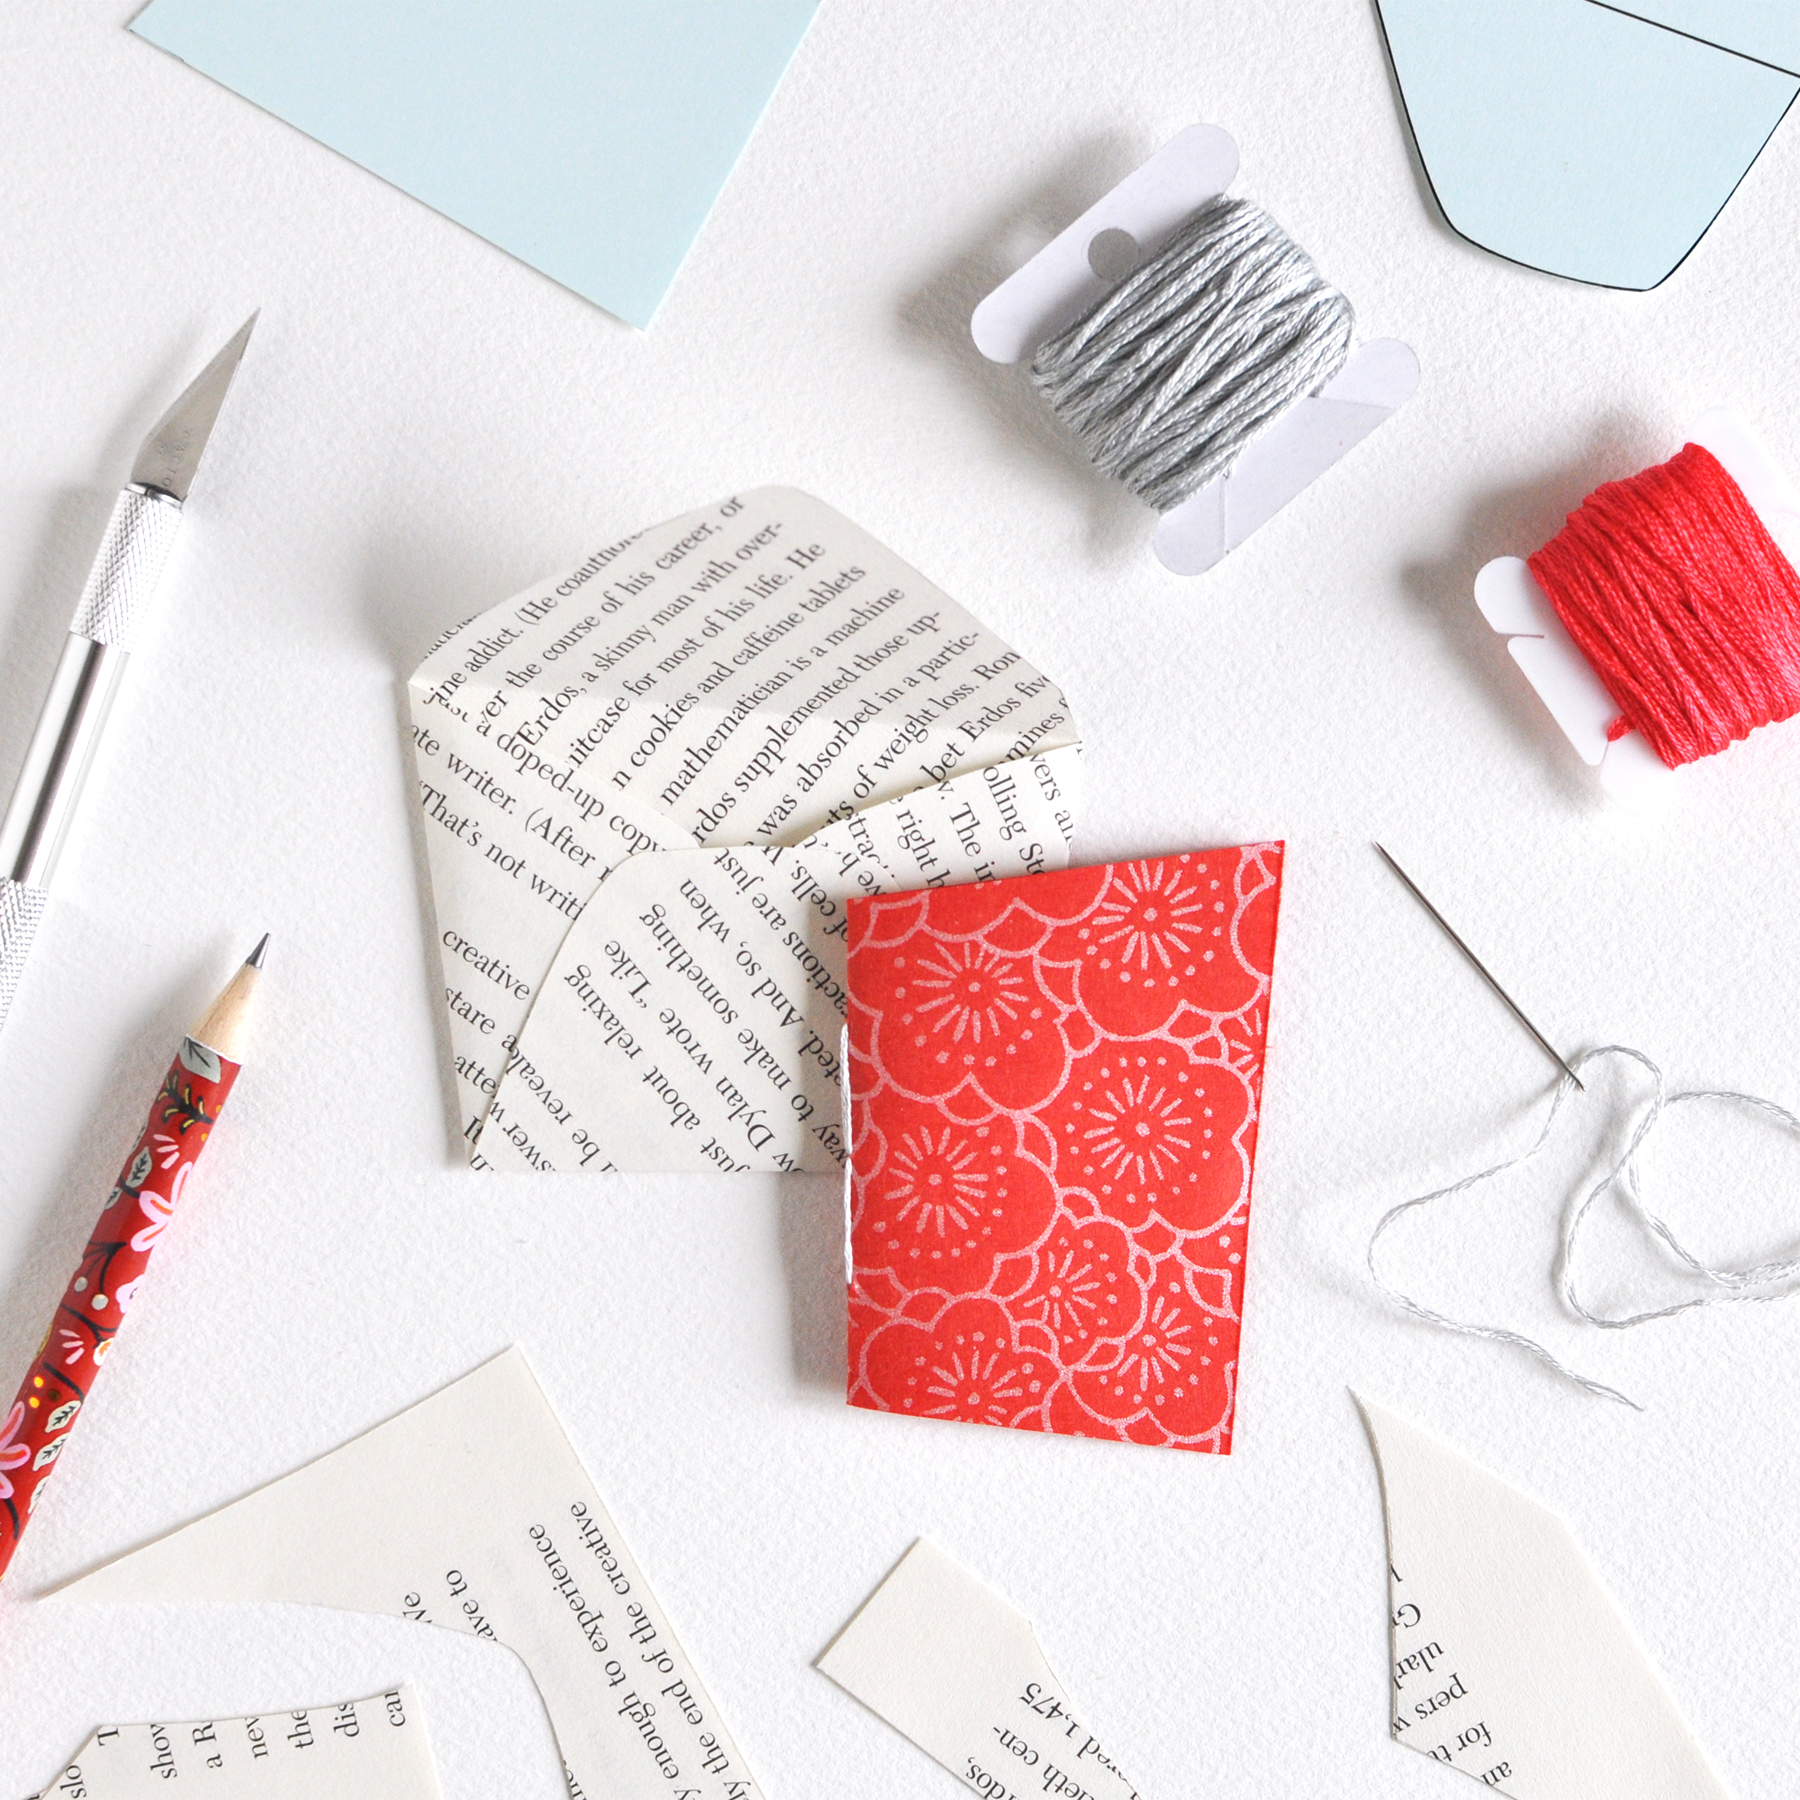
I’ve had such fun creating an ever-growing collection of handmade envelopes with mini accordion journals tucked inside! I thought you might want to give it a try, too, so I’ve created a new, free printable page and a quick tutorial to get you started.
If you’d like to create your own mini accordion journals and envelopes, start by downloading and printing my mini envelope and journal template. (The file includes two page sizes. The first page is letter sized. The second page is A4.) You’ll also need a pencil, scissors, tape or glue, and extra paper for making your envelopes.

Begin by cutting out the envelope template and mini journals. For the mini journals, I like to cut just inside the dashed lines so they don’t appear on the journals.
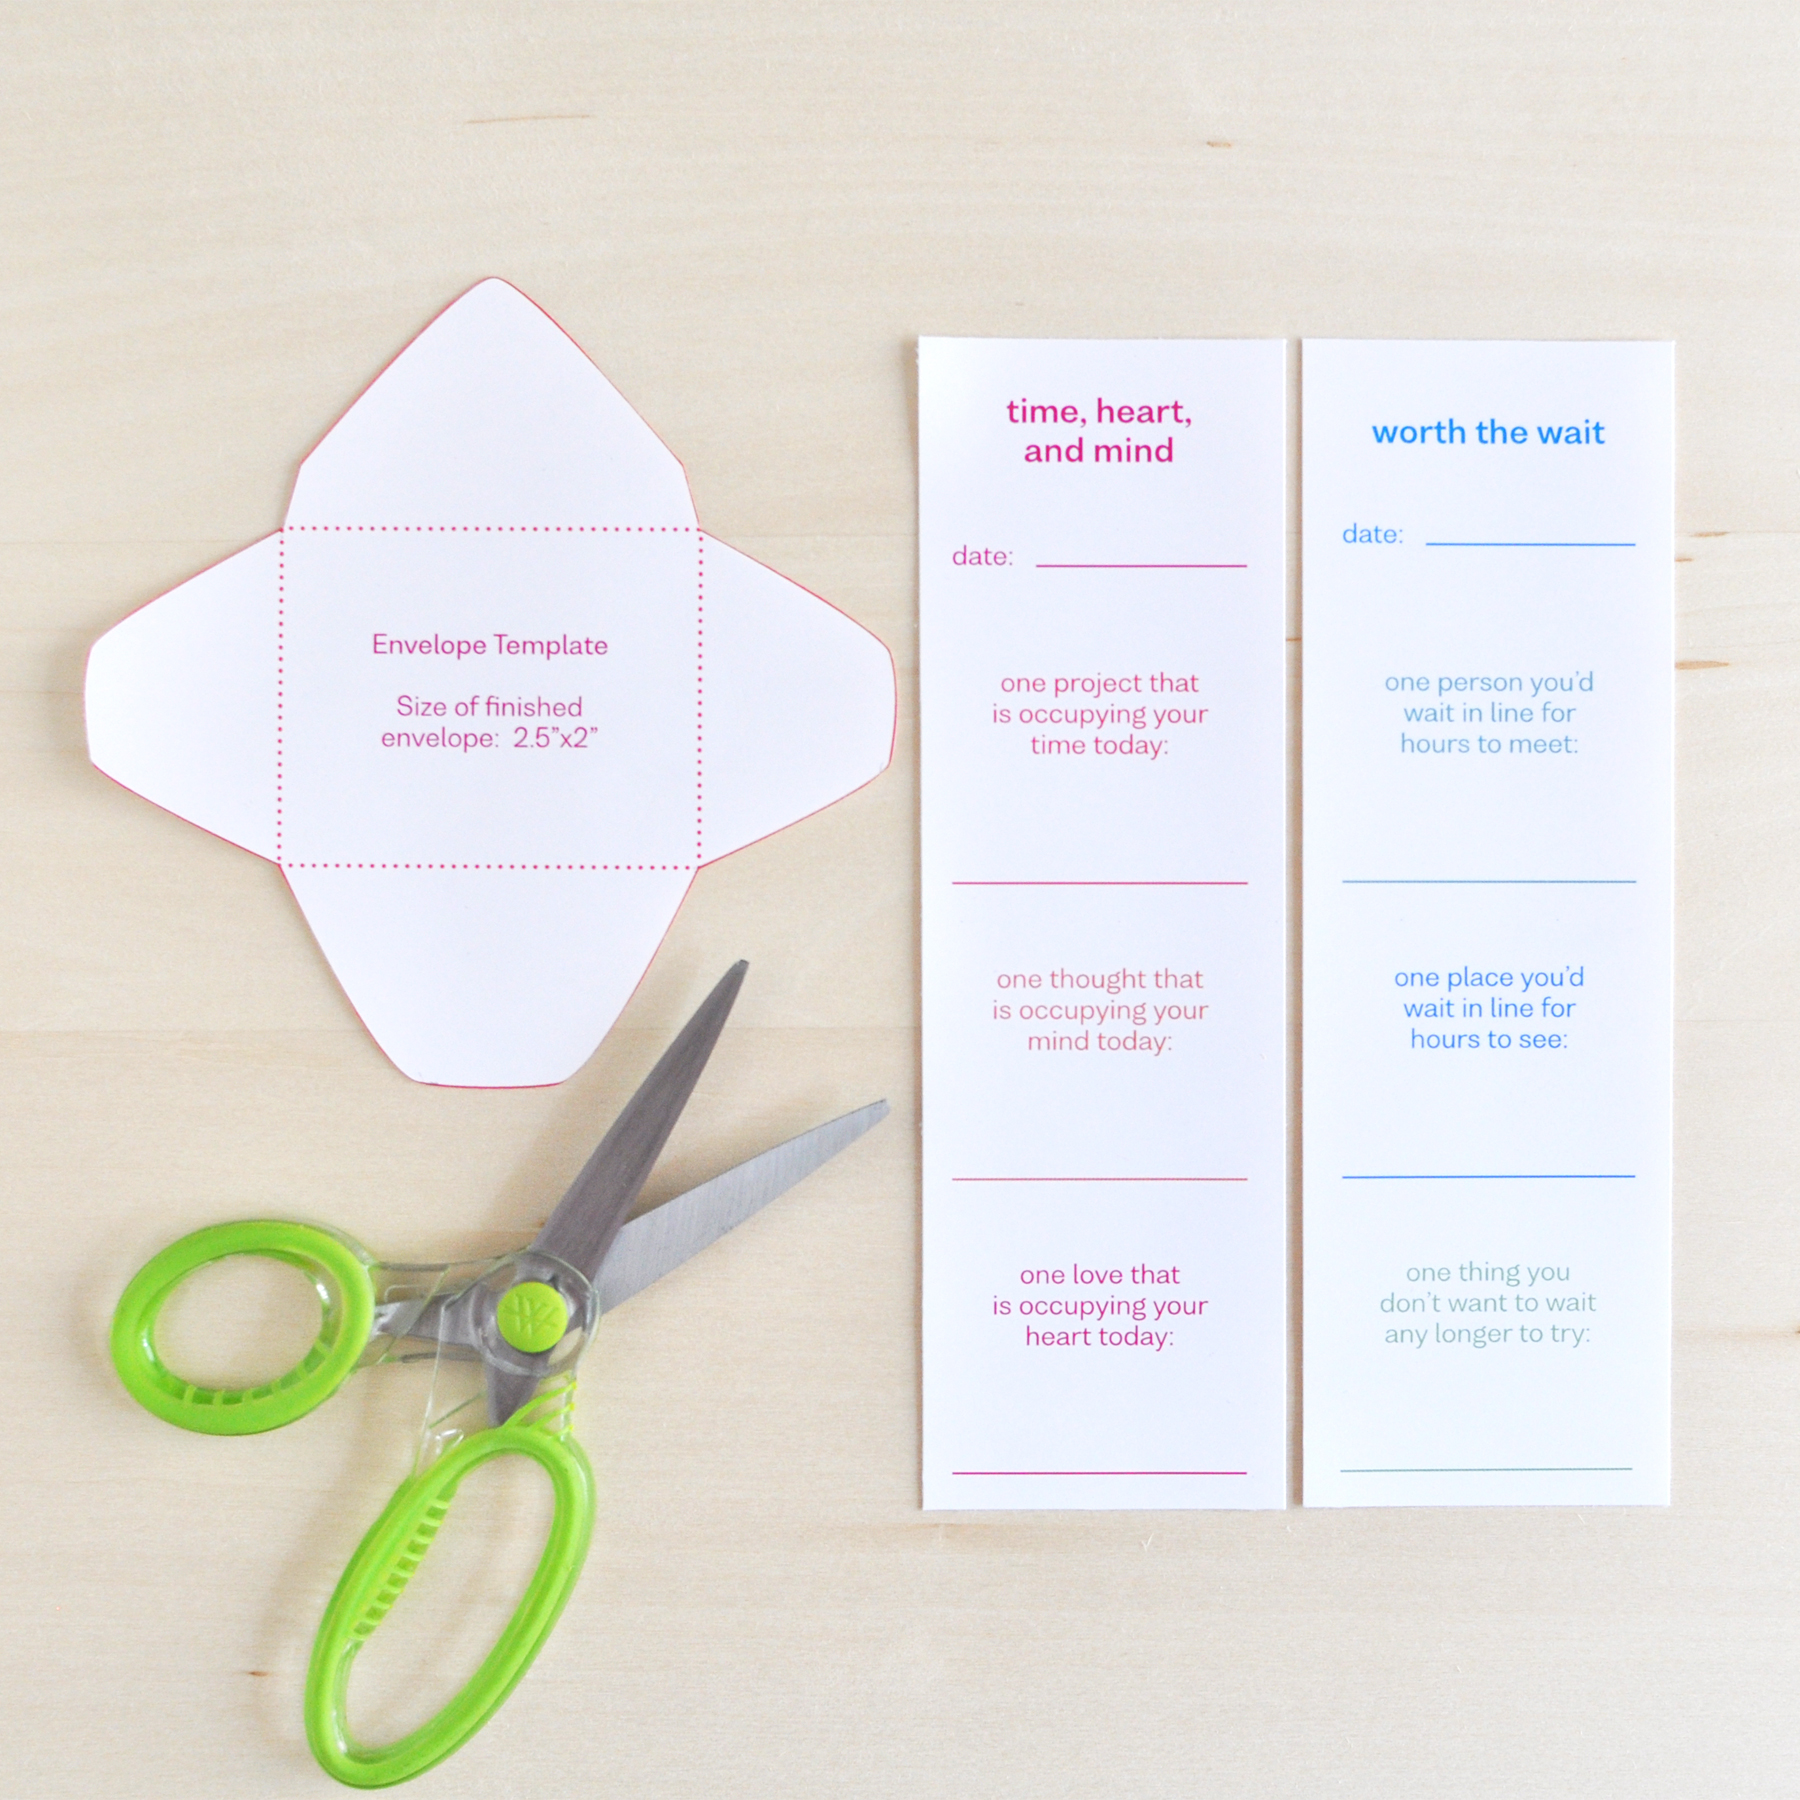
Next, trace the outline of your envelope template onto the back of your chosen paper and cut it out. I’m making two envelopes, one for each mini journal.

Now for the folding. With your envelope paper face down, fold the side tabs in toward the center using the dotted lines on the envelope template as a guide.
For the mini journals, I like to start by folding them in half, so that the top and bottom meet and the words are on the outside of the fold.

Fold the envelope bottoms up and over the side tabs, again using the dotted line in the envelope template as a guide, and apply glue or tape to attach the bottom to the sides. Then fold down the envelope top.
For the mini journals, fold the tops and bottoms in half again so that they meet up with the centre fold.
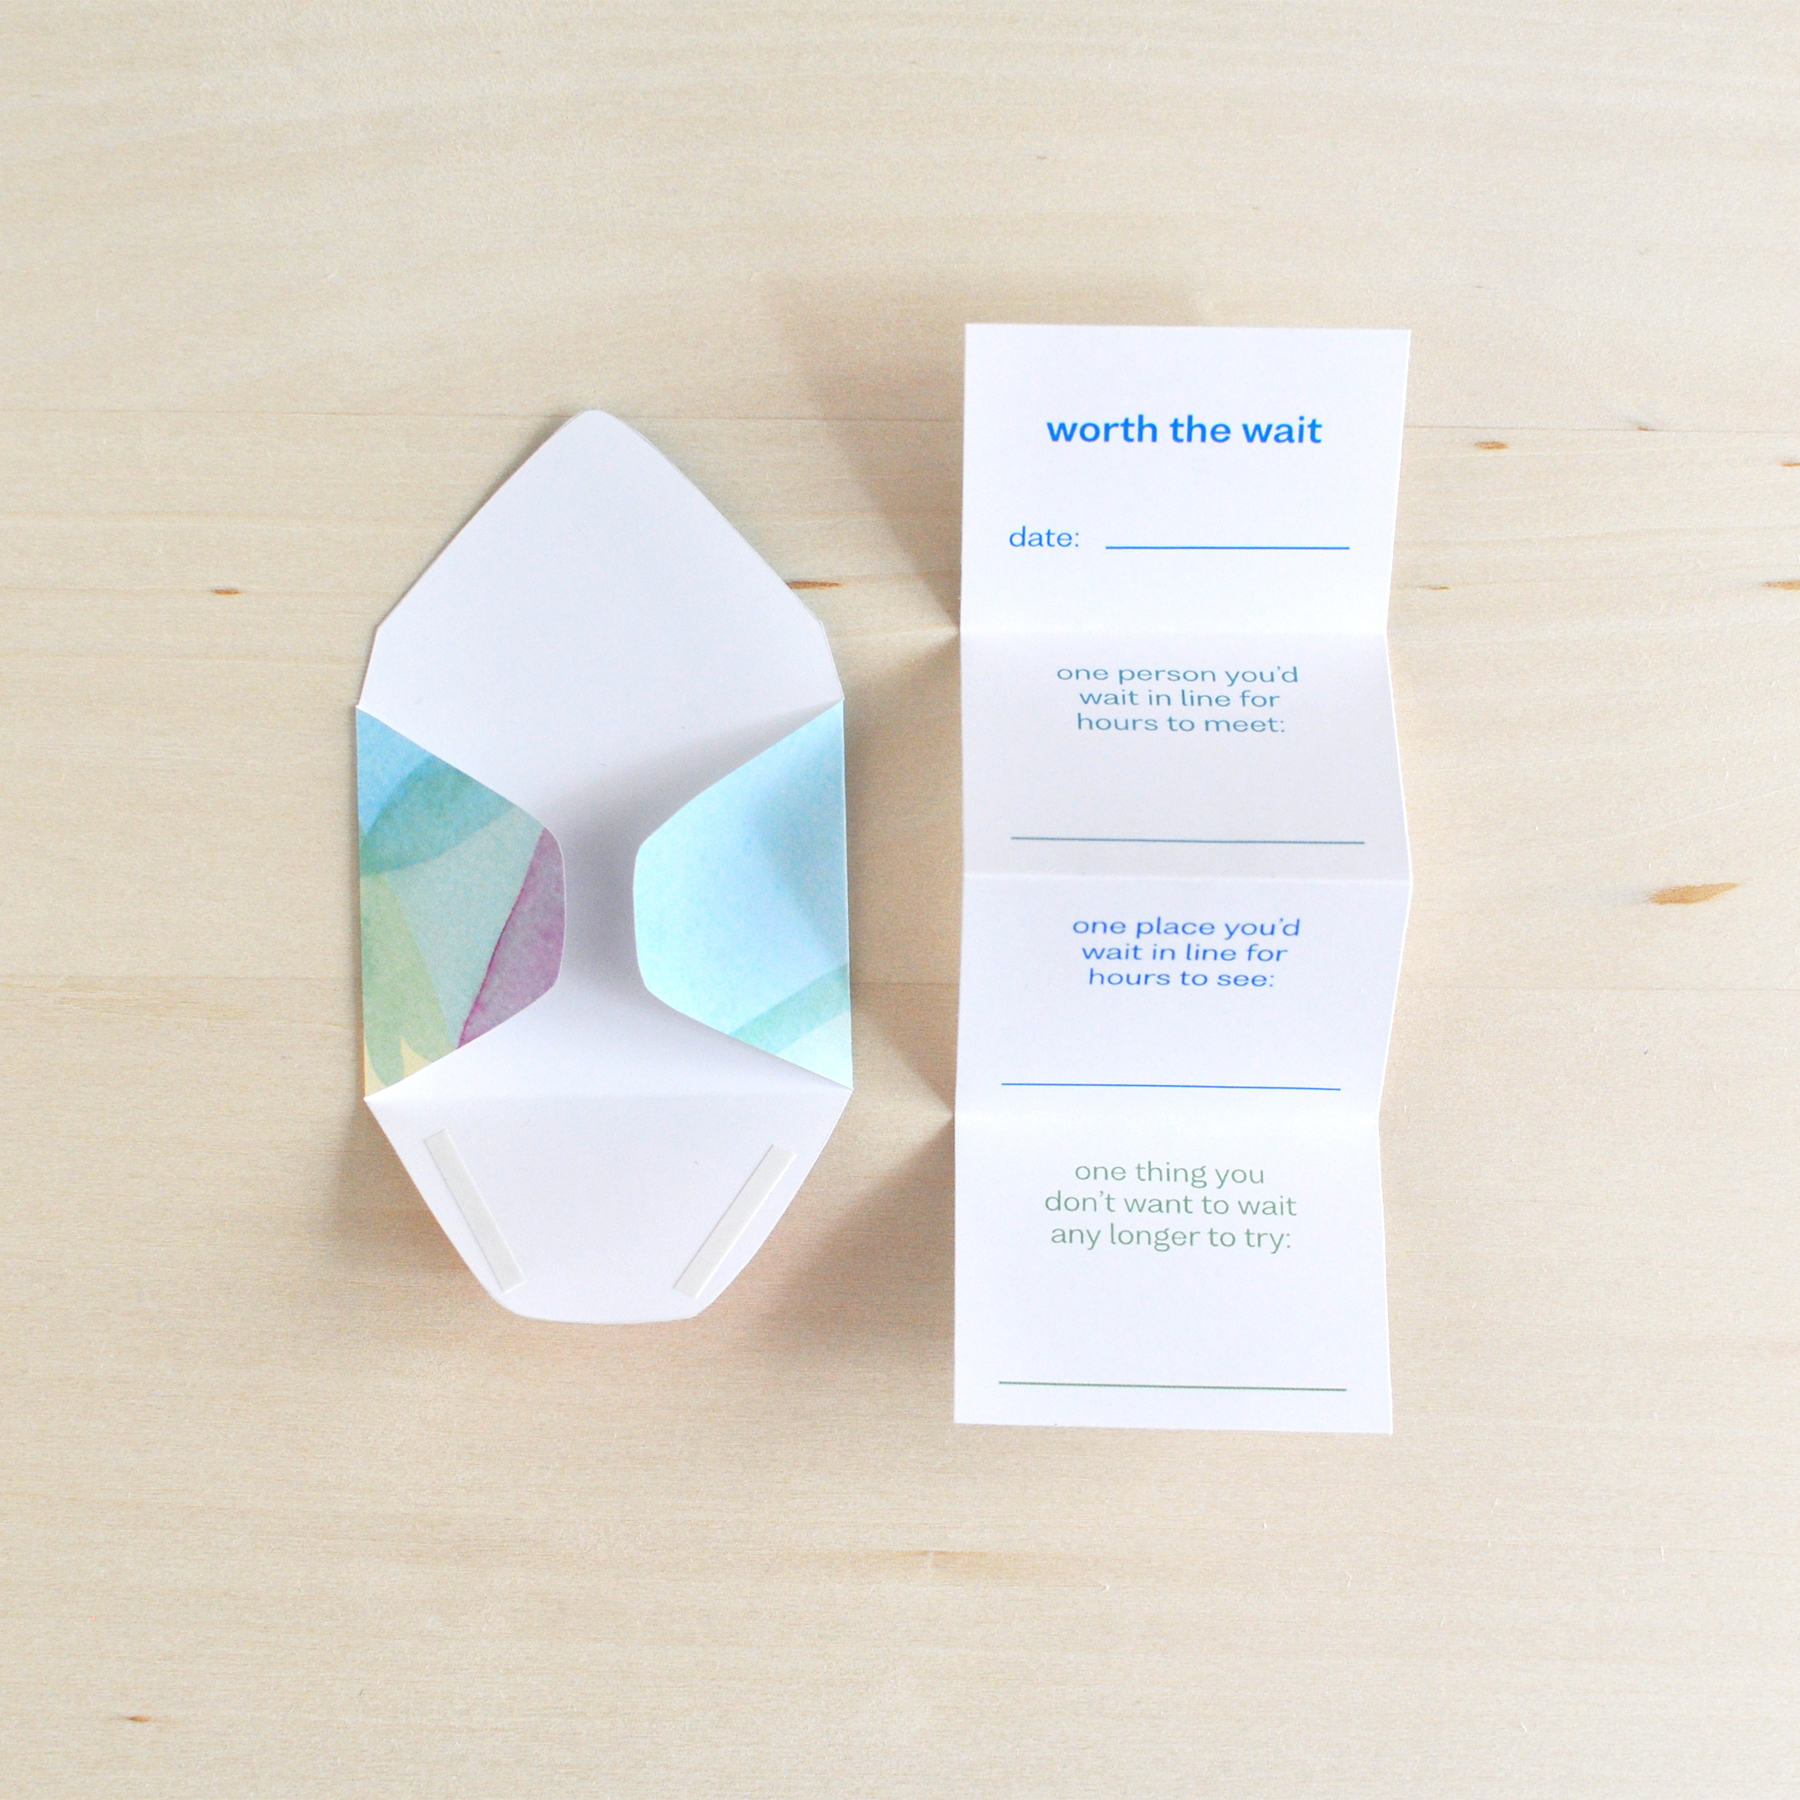
Insert your folded journals into your new envelopes and you’re finished!

You can record your answers to the prompts now and attach your envelopes to your journal or you can tuck your envelopes into a tote or backpack for a little journaling on the go.

I hope you’ll love this little journal project. If you’d like to try making more envelopes of different sizes and shapes and more mini journals, I’ve also posted a brand new printable handmade journal and envelope kit in the shop.

As always, happy journaling, friends!
Cloud journal

This week, I’m working on a new set of prompts and a tutorial for my mini accordion journals and envelopes. In the meantime, I thought I’d share this little cloud journal I put together with a few scraps from my paper stash. At first, I thought it might be a fun weather journal, but now I think I’ll fill it with my most unconventional ideas. (The list continues to grow!)
What are you up to today?
P.S. If you’d like to make your own mini cloud journal, I’ve posted a quick tutorial and free printable template to help you get started.
My collection of irregularly-shaped envelopes is growing . . .

. . . right along with my collection of mini accordion journals for tucking inside.
"word confessions" mini accordion journal (and handmade irregular envelope, of course)

My recent experiments with handmade irregular envelopes wouldn’t be complete without a few irregular prompts. I made a super-simple, three-prompt, mini-accordion guided journal to tuck inside my latest teeny tiny envelopes. And the prompts are . . . well, they’re a little unusual . . . a lighthearted look at the words confuse and amuse us.
My word confession for the day is that I’m never entirely sure if I’m using the word “ironic” correctly. (Is that ironic? I have no idea.)
How about you?
Irregular mini journal to go with my irregular envelopes
Still avoiding right angles today. I made an irregularly shaped mini journal to go with Friday’s irregularly shaped envelopes. I think I’ll fill it with irregular (and unexpected) prompts!
New envelopes in progress - irregular shapes

Trying out some new envelope shapes today. Not a right angle in sight. Next up, some irregularly shaped mini journals to tuck inside.